Type safety in Python
2021-02-18 00:00:00 +0000
Type safety in Python
ตัวแปรที่ประกาศใน Python เป็น Dynamically Typed กล่าวคือ เราสามารถประกาศตัวแปร โดยไม่ต้องระบุ data type ได้ ตัวแปรจะถูกระบุ type เมื่อเรามีการใส่ค่าให้มัน เช่น
name = "Athiporn Phumnicom"

print(type(a))
#<class 'str'>
จากตัวอย่าง ตัวแปร a ที่ได้สร้างไว้ เป็น type str เพราะเรามีการระบุค่าที่เป็น str ให้กับ name Python จะไม่รู้ว่าตัวแปรนั้นเป็น type อะไรจนกว่าจะรันคำสั่งบรรทัดนั้น
เปรียบเทียบกับภาษา Java
ภาษา Java เป็น Statically Typed กล่าวคือ เมื่อมีการสร้างตัวแปรในภาษา Java เราจะต้องระบุ String type ด้วย
String name = "Athiporn Phumnicom";
Java จะรู้ว่า name เป็น String ตั้งแต่การประกาศในตอนแรก เฉพาะฉะนั้นค่าที่เราจะระบุได้ ต้องเป็น type String เท่านั้น สมมุติถ้าเราใส่ค่าที่เป็น Int จะทำให้ compile error
ทำไมต้องให้ความสำคัญกับ Types
โดยปกติ เราสามารถเขียนโค้ตได้เร็วกว่าถ้าภาษาที่เป็น dynamically-typed อย่าง Python เพราะเราไม่ต้องสนใจ ไม่ต้องคอยกังวลว่าตัวแปรที่ประกาศจะใช้เป็น type อะไร แต่เมื่อโปรแกรมหรือโค้ตที่เราเขียนมีขนาดใหญ่ขึ้น อาจทำให้เป็น bugs ได้ ภาษาที่เป็น static typing จึงเป็นตัวเลือกที่ดีกว่า
ตัวอย่างโปรแกรม
def get_first_name(full_name):
    return full_name.split(" ")[0]

fallback_name = {
    "first_name": "UserFirstName",
    "last_name": "UserLastName"
}

raw_name = input("Please enter your name: ")
first_name = get_first_name(raw_name)

# If the user didn't type anything in, use the fallback name
if not first_name:
    first_name = get_first_name(fallback_name)

print(f"Hi, {first_name}!")
จากตัวอย่างเป็นโปรแกรมง่ายๆ ที่จะให้ User ป้อนชื่อเข้ามาแล้วแสดงผล เช่น **Hi,
เมื่อลองรันดูจะเห็นว่าโปรแกรมก็ทำงานได้ปกติ แต่ปัญหาจะเกิดเมื่อ User ใส่ค่า black เข้ามา
Please enter your name:
Traceback (most recent call last):
  File "c:\Users\BlackDragon\source\repos\TypeSafe\sample3.py", line 14, in <module>
    first_name = get_first_name(fallback_name)
  File "c:\Users\BlackDragon\source\repos\TypeSafe\sample3.py", line 2, in get_first_name
    return full_name.split(" ")[0]
AttributeError: 'dict' object has no attribute 'split'
ปัญหานี้เกิดจากตัวแปร fallback_name ไม่ใช่ type string แต่มันคือ type dictionary เมื่อเรียกฟังก์ชัน get_frist_name แล้วส่งตัวแปร fallback_name เข้าไป ทำให้ฟังก์ชัน .split() ไม่สามารถทำงานได้
Reference:
Improve Network Performance
2021-01-22 00:00:00 +0000
Improve Network Performance
สำหรับสาย Dev ที่มีการพัฒนา Web application ใช้งาน Internet Information Services (IIS) เป็น Web Server ในระบบปฏิบัติการ Windows 8 และ Windows 2012 นะครับ
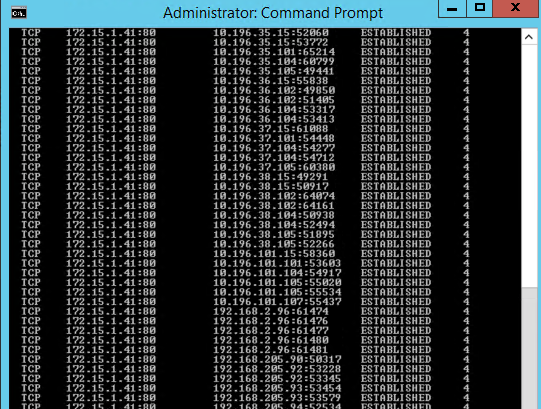
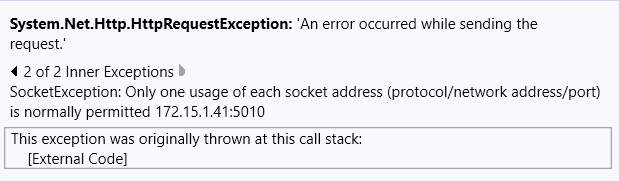
ตอนรันทดสอบในเครื่องทดสอบหรือเครื่องตัวเองก็อาจจะไม่พบปัญหา แต่เมื่อ Publish ขึ้น Production อาจะเจอ Error SocketException: Only one usage of each socket address (protocol/network address/port) is normally permitted และตามด้วย IP:Port ที่เราเรียกใช้งาน
กรณีนี้อาจเกิดจาก Port ฝั่ง Outbound บนเครื่อง Server เต็มเมื่อมีการ Request จาก Client เป็นจำนวนมาก
สามารถดู Dynamic port ได้โดยใช้ Command
netsh int ipv4 show dynamicport tcp
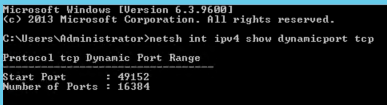
ส่วนมากจะเป็นกับ Windows 8 และ Windows Server 2012 ซึ่งมีค่า Default ดังนี้
- MaxUserPort = 1024 - 5000
- TcpTimedWaitDelay = 4 นาที
MaxUserPort
เป็นค่าที่ใช้ในการระบุจำนวน port สูงสุดที่มีการ Request จาก Application และเชื่อมต่อเข้ามายังฝั่ง Server โดยปกติจะมีค่าอยู่ระหว่าง 1024 ถึง 5000 สามารถเปลี่ยนค่าได้ ดังนี้
- เปิด command prompt แล้วรันคำสั่ง regedit
- ไปที่ HKEY_LOCAL_MACHINE\SYSTEM\ CurrentControlSet\Services\TCPIP\Parameters
- สร้างคีย์เป็น REG_DWORD และตั้งชื่อว่า MaxUserPort
- ระบุค่าเป็น Decimal 32768 (สูงสุดที่ 65534)
TcpTimedWaitDelay
เป็นค่าที่ใช้ในการระบุระยะเวลาในการ Release หรือ Terminate port เมื่อไม่มีการใช้งานแล้ว โดยปกติค่านี้จะอยู่ที่ 4 นาที สามารถเปลี่ยนค่าได้ ดังนี้
- เปิด command prompt แล้วรันคำสั่ง regedit
- ไปที่ HKEY_LOCAL_MACHINE\SYSTEM\ CurrentControlSet\Services\TCPIP\Parameters
- สร้างคีย์เป็น REG_DWORD และตั้งชื่อว่า TcpTimedWaitDelay
- ระบุค่าเป็น Decimal 30 (มีหน่วยเป็นวินาที)
Reference:
- Settings that can be Modified to Improve Network Performance
- Configuring MaxUserPort (Maximum user ports)
C# Protected Memory

2021-01-10 00:00:00 +0000
Data Protection
ในการเขียนโปรแกรม สิ่งสำคัญที่สุดคือข้อมูลที่มีการใช้งานภายในโปรแกรม ซึ่งอาจเป็นข้อมูลที่สำคัญมากหรือ Sensitive data
บางส่วนอาจมีการเก็บใน Disk บางส่วนอาจอยู่ใน Memory แล้วแต่โปรแกรมเมอร์จะออกแบบ
แต่ในกรณีที่จำเป็นจะต้องเก็บข้อมูลสำคัญลงใน Memory ใน .NET ได้ Provides ProtectedMemory Class ให้เราได้เรียกใช้งานในการปกป้องข้อมูลสำคัญใน Memory
ProtectedMemory Class
Namespace: System.Security.Cryptography
Assembly: System.Security.dll
ใน ProtectedMemory Class ได้ Provides 2 Methods ในการป้องกันและยกเลิกการป้องกันข้อมูลใน Memory
| Methods | |
|---|---|
| Protect(Byte[], MemoryProtectionScope) | Protects the specified data. |
| Unprotect(Byte[], MemoryProtectionScope) | Unprotects data in memory that was protected using the Protect(Byte[], MemoryProtectionScope) method. |
ตัวอย่างการใช้งาน ProtectedMemory Class
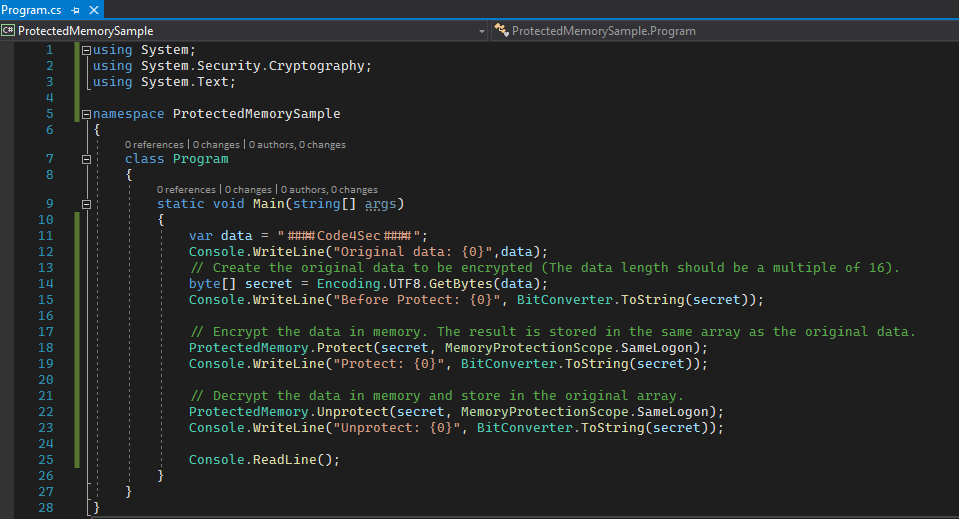
ในการเรียกใช้งาน Protect Method ข้อมูลที่ต้องการป้องกัน จะต้องเป็น Bytes array ที่มีขนาด 16
กรณีที่ข้อมูลมีขนาดใหญ่ อาจจะต้องมีการนำ Loop เข้ามาช่วยในการแบ่งข้อมูลเพื่อให้ได้ขนาดตามที่กำหนด
using System;
using System.Security.Cryptography;
using System.Text;
namespace ProtectedMemorySample
{
class Program
{
static void Main(string[] args)
{
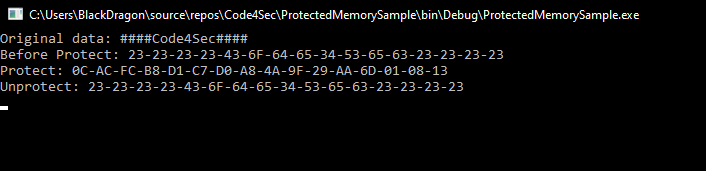
var data = "####Code4Sec####";
Console.WriteLine("Original data: {0}",data);
// Create the original data to be encrypted (The data length should be a multiple of 16).
byte[] secret = Encoding.UTF8.GetBytes(data);
Console.WriteLine("Before Protect: {0}", BitConverter.ToString(secret));
// Encrypt the data in memory. The result is stored in the same array as the original data.
ProtectedMemory.Protect(secret, MemoryProtectionScope.SameLogon);
Console.WriteLine("Protect: {0}", BitConverter.ToString(secret));
// Decrypt the data in memory and store in the original array.
ProtectedMemory.Unprotect(secret, MemoryProtectionScope.SameLogon);
Console.WriteLine("Unprotect: {0}", BitConverter.ToString(secret));
Console.ReadLine();
}
}
}
ผลลัพธ์
Reference:
C# Assembly Load
2021-01-09 00:00:00 +0000
Assembly
โปรแกรมในภาษา C# อาจประกอบด้วย source code หนึ่งไฟล์หรือหลายๆ ไฟล์ก็ได้ คลาสหนึ่งคลาสอาจถูกนิยามไว้ภายในไฟล์เดียว (ปรกติจะมีนามสกุล .cs) หรือหลายๆ ไฟล์ก็ได้
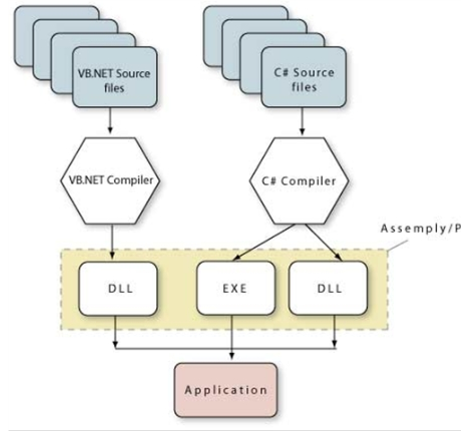
เมื่อผ่านการคอมไพล์โปรแกรมให้เป็นโปรแกรมประยุกต์ จะได้ไฟล์นามสกุล .exe หากคอมไพล์โปรแกรมให้เป็นไลบรารี (คือโปรแกรมที่ไม่มี method main()) จะได้ไฟล์นามสกุล .dll แม้ไฟล์ทั้งสองแบบนี้ จะมีนามสกุลเหมือนโปรแกรมแบบ Win32 แต่โครงสร้างภายในกลับไม่เหมือนกันเลย โดยไฟล์ assembly จะบรรจุโค้ดที่คอมไพล์แล้ว (เป็นภาษา MSIL ที่อยู่ในสภาพไบนารี) และข้อมูลแบบ metadata ให้โปรแกรมอื่นสามารถนำไป Reference เพื่อเรียกใช้งาน Class หรือ Method ภายในไฟล์ .dll ได้โดยไม่ต้องเขียนเองใหม่ทั้งหมด
Assemble ที่ผ่านการ Sign แล้ว จะเกิดเป็น Strong name
Strong name ประกอบด้วย
- Assembly name คือชื่อของ dll file
- Version Number คือ เวอร์ชั่นของ dll
- Culture information คือ Culture เราสามารถกำหนดเองได้ แต่ถ้าไม่ได้กำหนด ค่า default จะเป็น neutral
- Public key token จะเกิดจากการเอา 3 ค่าแรก ผ่านกระบวนการ Sign แล้วจะเกิดเป็น Public key token
ในการ Load file assemblies มาใช้งานนั้น เราจะโหลดผ่าน Method ที่ชื่อว่า "Assembly.Load(String)" วิธีนี้จะช่วยป้องกันการเรียกใช้งาน Assembly ที่ไม่ถูกต้อง เนื่องจากเราต้องระบุเป็น Strong name ของ Assembly นั้น และยังช่วยเรื่องผู้ไม่หวังดีนำไฟล์ .dll ไปแก้ไขแล้วให้เราเรียกใช้ โปรแกรมจะไม่สามารถทำงานได้ เนื่องจากไฟล์ .dll ที่ถูกแก้ไขและมีการ Sign ใหม่แล้ว จะมีค่า Strong name ที่เปลี่ยนไป
Assembly.Load Method
Namespace: System.Reflection
Assembly: System.Runtime.dll
ตัวอย่างการใช้งาน Assembly.Load Method
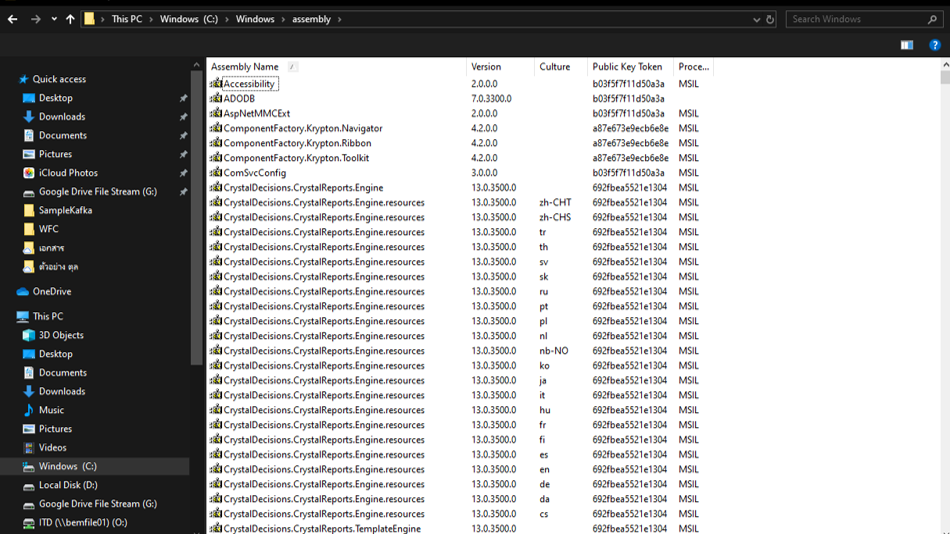
List assemblies ที่มีอยู่ในเครื่องขึ้นมาทั้งหมด โดยใช้ Tools Developer Command Prompt แล้วใช้คำสั่ง gacutil –l

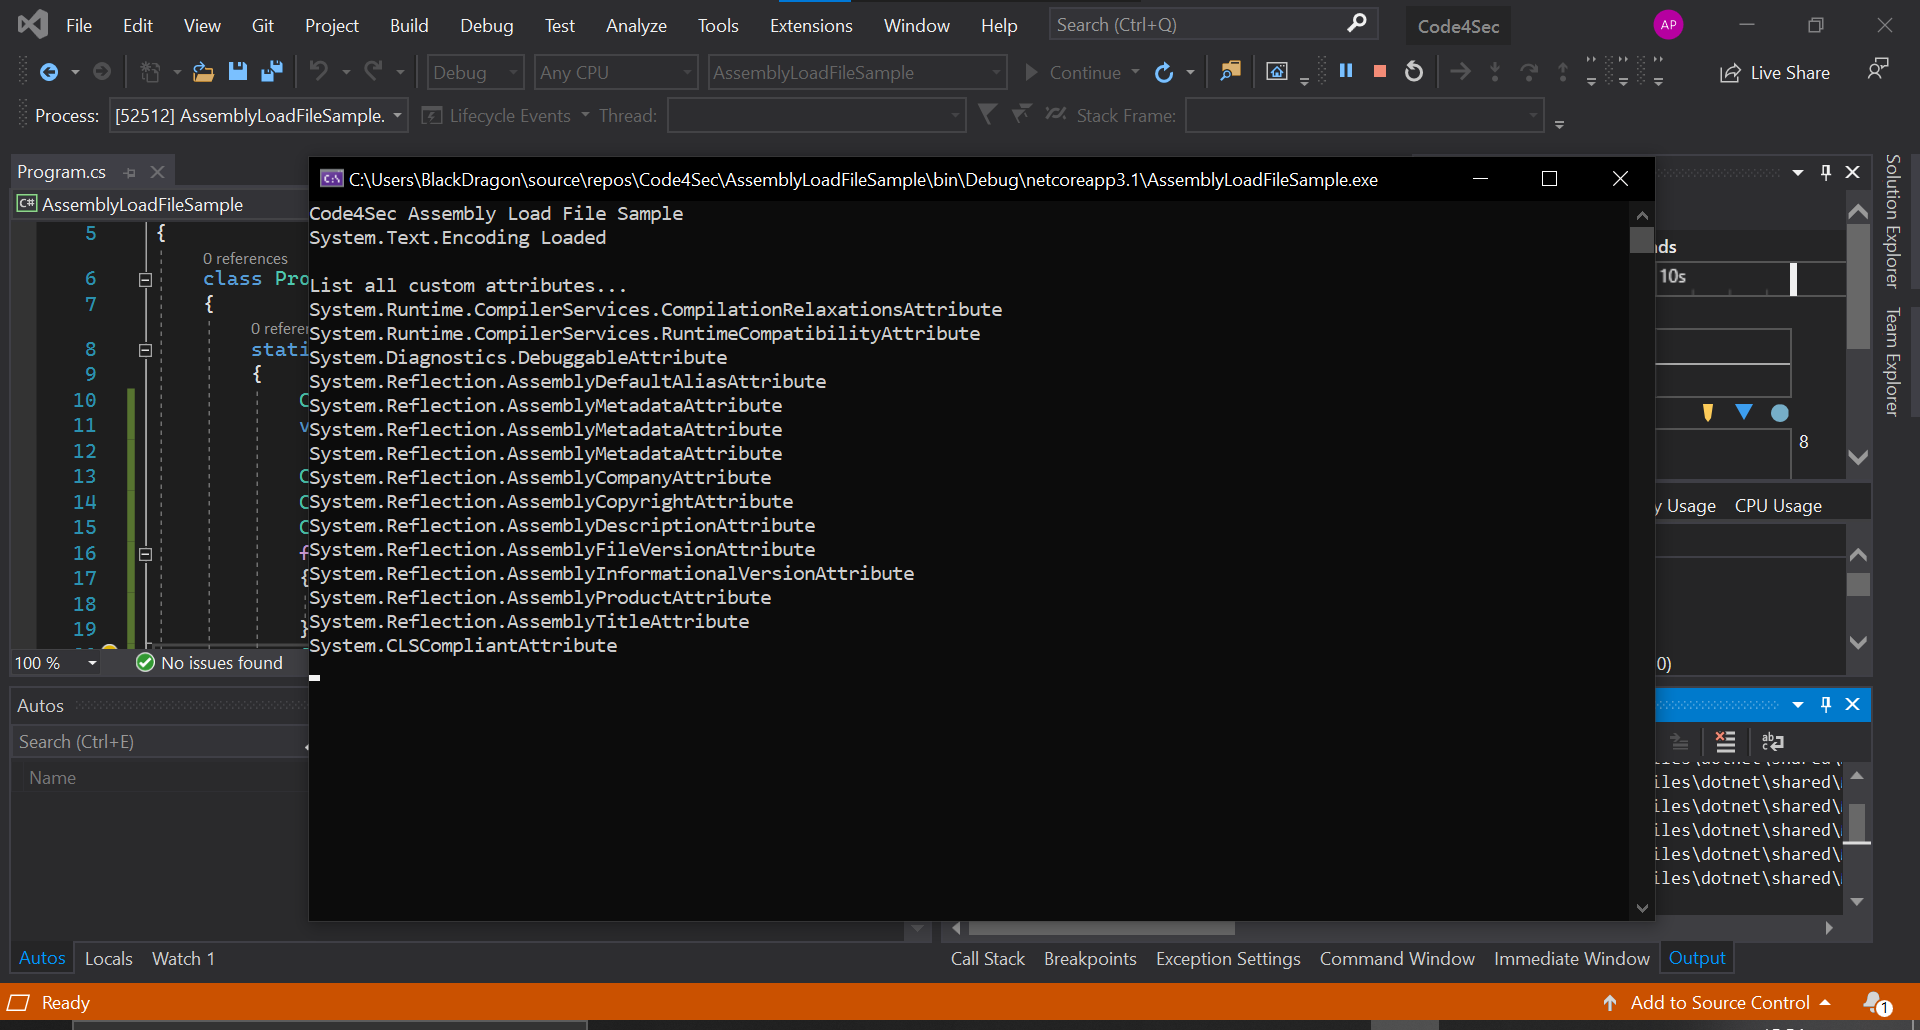
ทดสอบโหลด "System.Text.Encoding, Version=4.0.0.0, Culture=neutral, PublicKeyToken=b03f5f7f11d50a3a, processorArchitecture=MSIL" เข้ามาใช้งานใน Project ของเรา
var assembly = Assembly.Load("System.Text.Encoding, Version=4.0.0.0, Culture=neutral, PublicKeyToken=b03f5f7f11d50a3a");
Reference:
C# IdentityOptions
2021-01-08 00:00:00 +0000
Broken Authentication
การใช้ ASP.NET Core Identity framework ได้มีการกำหนดค่าเริ่มต้นมาแล้วเป็นอย่างดี โดยใช้ Password hashes ใช้งานร่วมกับ salt Identity ใช้ฟังก์ชันการแฮช PBKDF2 สำหรับรหัสผ่านและสร้าง salt สำหรับผู้ใช้แต่ละคน ในบทความนี้เป็นตัวอย่างการใช้ IdentityOptions Class ในการกำหนด Password Policy
IdentityOptions Class
Namespace: Microsoft.AspNetCore.Builder
Assembly: Microsoft.AspNetCore.Identity.dll
IdentityOptions Class ใช้สำหรับการ Config ระบบ Identity โดยมี Properties มากมายให้เรียกใช้งานได้ ดังนี้ (บทความนี้เป็นตัวอย่างของการใช้ Password Property)
| Properties | |
|---|---|
| ClaimsIdentity | Gets or sets the ClaimsIdentityOptions for the identity system. |
| Cookies | Gets or sets the IdentityCookieOptions for the identity system. |
| Lockout | Gets or sets the LockoutOptions for the identity system. |
| OnSecurityStampRefreshingPrincipal | Invoked when the default security stamp validator replaces the user’s ClaimsPrincipal in the cookie. |
| Password | Gets or sets the PasswordOptions for the identity system. |
| SecurityStampValidationInterval | Gets or sets the TimeSpan after which security stamps are re-validated. |
| SignIn | Gets or sets the SignInOptions for the identity system. |
| Tokens | Gets or sets the TokenOptions for the identity system. |
| User | Gets or sets the UserOptions for the identity system. |
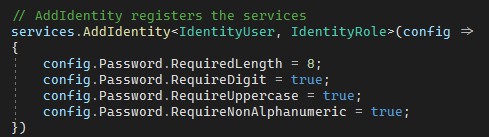
การกำหนด Password Policy โดยใช้ IdentityOptions Class
กำหนด Password Policy สำหรับใช้ในการลงทะเบียนเพื่อเข้าใช้งานระบบ ดังนี้
- ความยาวอย่างน้อย 8 ตัวอักษร
- ต้องมีตัวเลข
- ต้องมีตัวพิมพ์ใหญ่
- ต้องมีอักขระพิเศษ
ทดสอบการลงทะเบียนเข้าใช้งานระบบ ถ้าเราใส่ Password ไม่ถูกต้องตาม Password Policy จะไม่สามารถลงทะเบียนได้ ดังรูปด้านล่าง

Reference:
- IdentityOptions Class
- Configure ASP.NET Core Identity
- Introduction to Identity on ASP.NET Core
- OWASP:A2 Broken Authentication
C# AuthorizeAttribute

2021-01-07 00:00:00 +0000
Authorization in ASP.NET Core
ปกติ Application ส่วนใหญ่จะมีการจำกัดสิทธิ์ในการเข้าถึงหรือการเข้าใช้งาน ว่าผู้ใช้ระดับใดที่เข้าใช้งานระบบหรือฟังก์ชันนั้นได้บ้าง โดยเราสามารถกำหนดได้ที่ Class หรือ Method ได้เลย ซึ่งใน ASP.NET ได้มีการ Provide Class ให้เราได้เรียกใช้งานได้อย่างง่ายดาย เป็น Class ที่ชื่อว่า "AuthorizeAttribute" และ Class นี้มีความพิเศษตรงที่เป็น Attribute class ทำให้เราสามารถนำไป Applies กับ Class หรือ Method ของเราได้
AuthorizeAttribute Class
Namespace: Microsoft.AspNetCore.Authorization
Assembly: Microsoft.AspNetCore.Authorization.dll
| Properties | |
|---|---|
| AuthenticationSchemes | Gets or sets a comma delimited list of schemes from which user information is constructed. |
| Policy | Gets or sets the policy name that determines access to the resource. |
| Roles | Gets or sets a comma delimited list of roles that are allowed to access the resource. |
ตัวอย่างการใช้งาน AuthorizeAttribute
ในตัวอย่างมี 2 Method คือ Index และ Privacy ทำหน้าที่เป็น Controller เมื่อทดสอบรันโปรแกรม เราสามารถเข้าใช้งานได้ทั้ง 2 Method ดังรูป
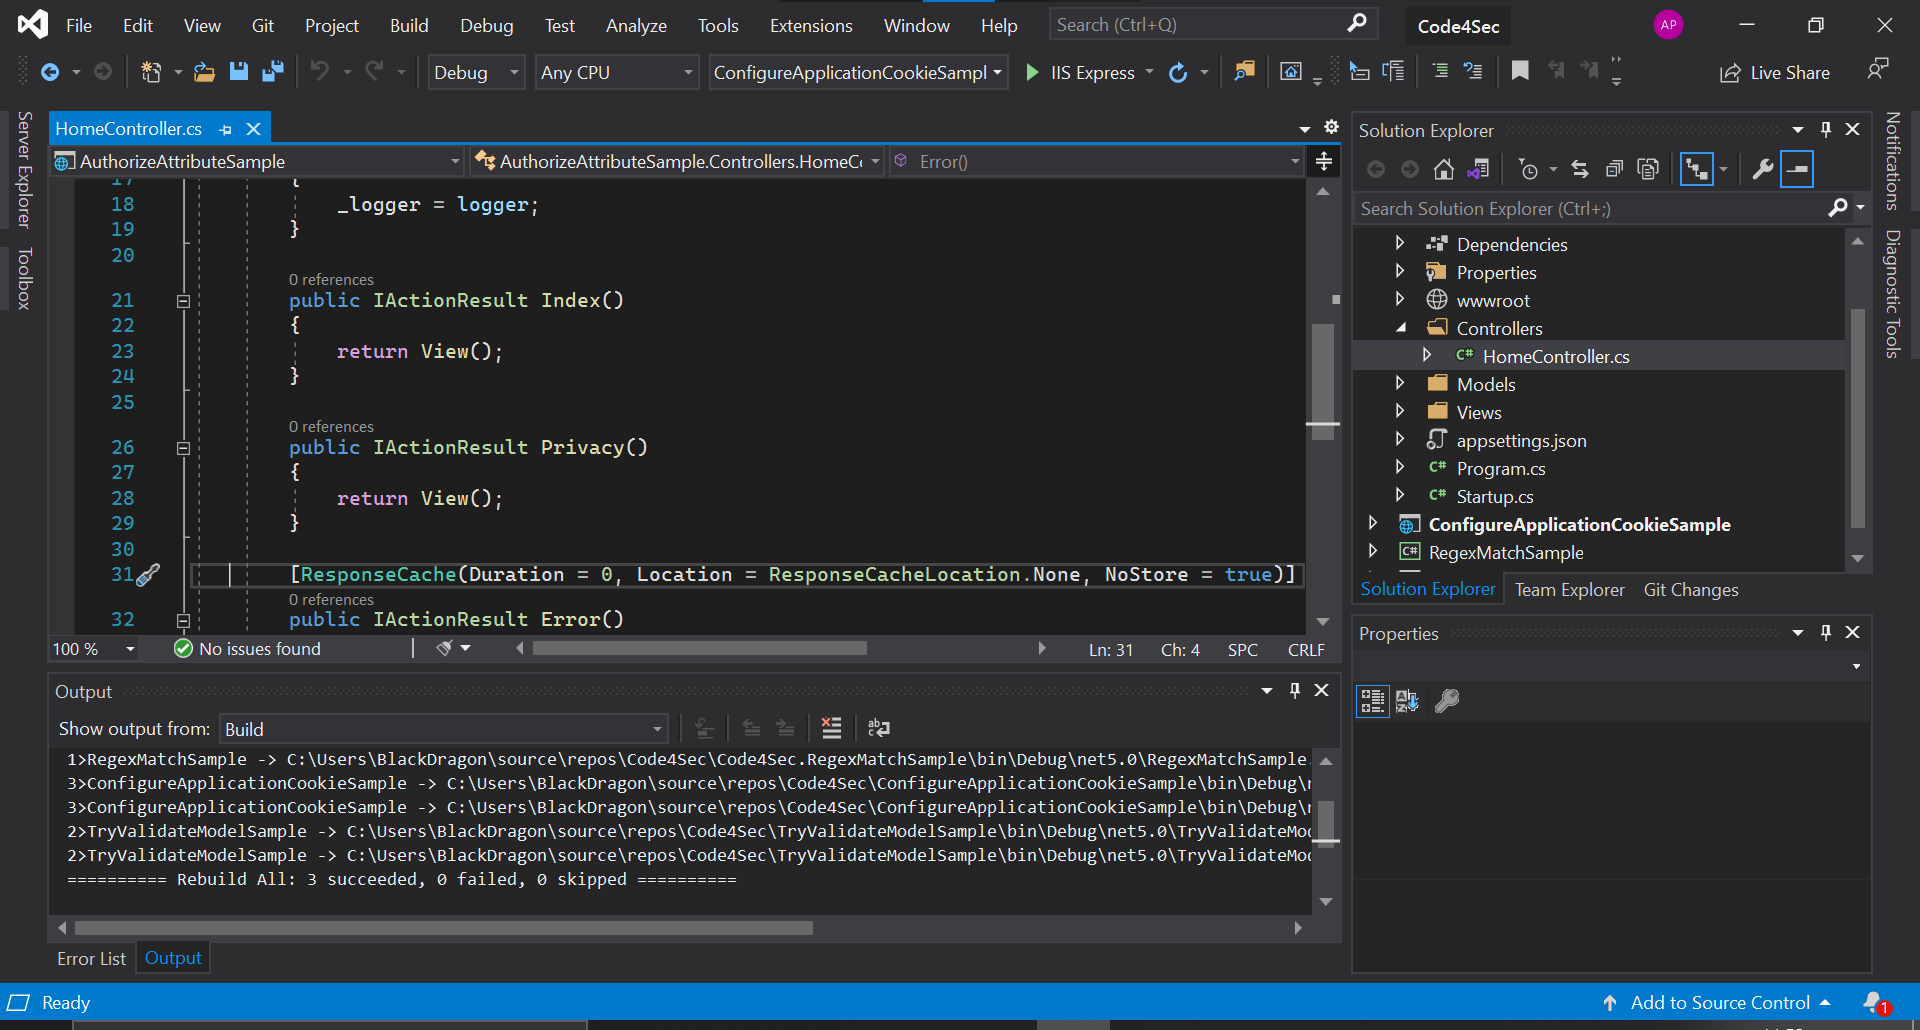
ลองเข้าใช้งานหน้า Privacy จะสามารถเข้าใช้งานได้ปกติ

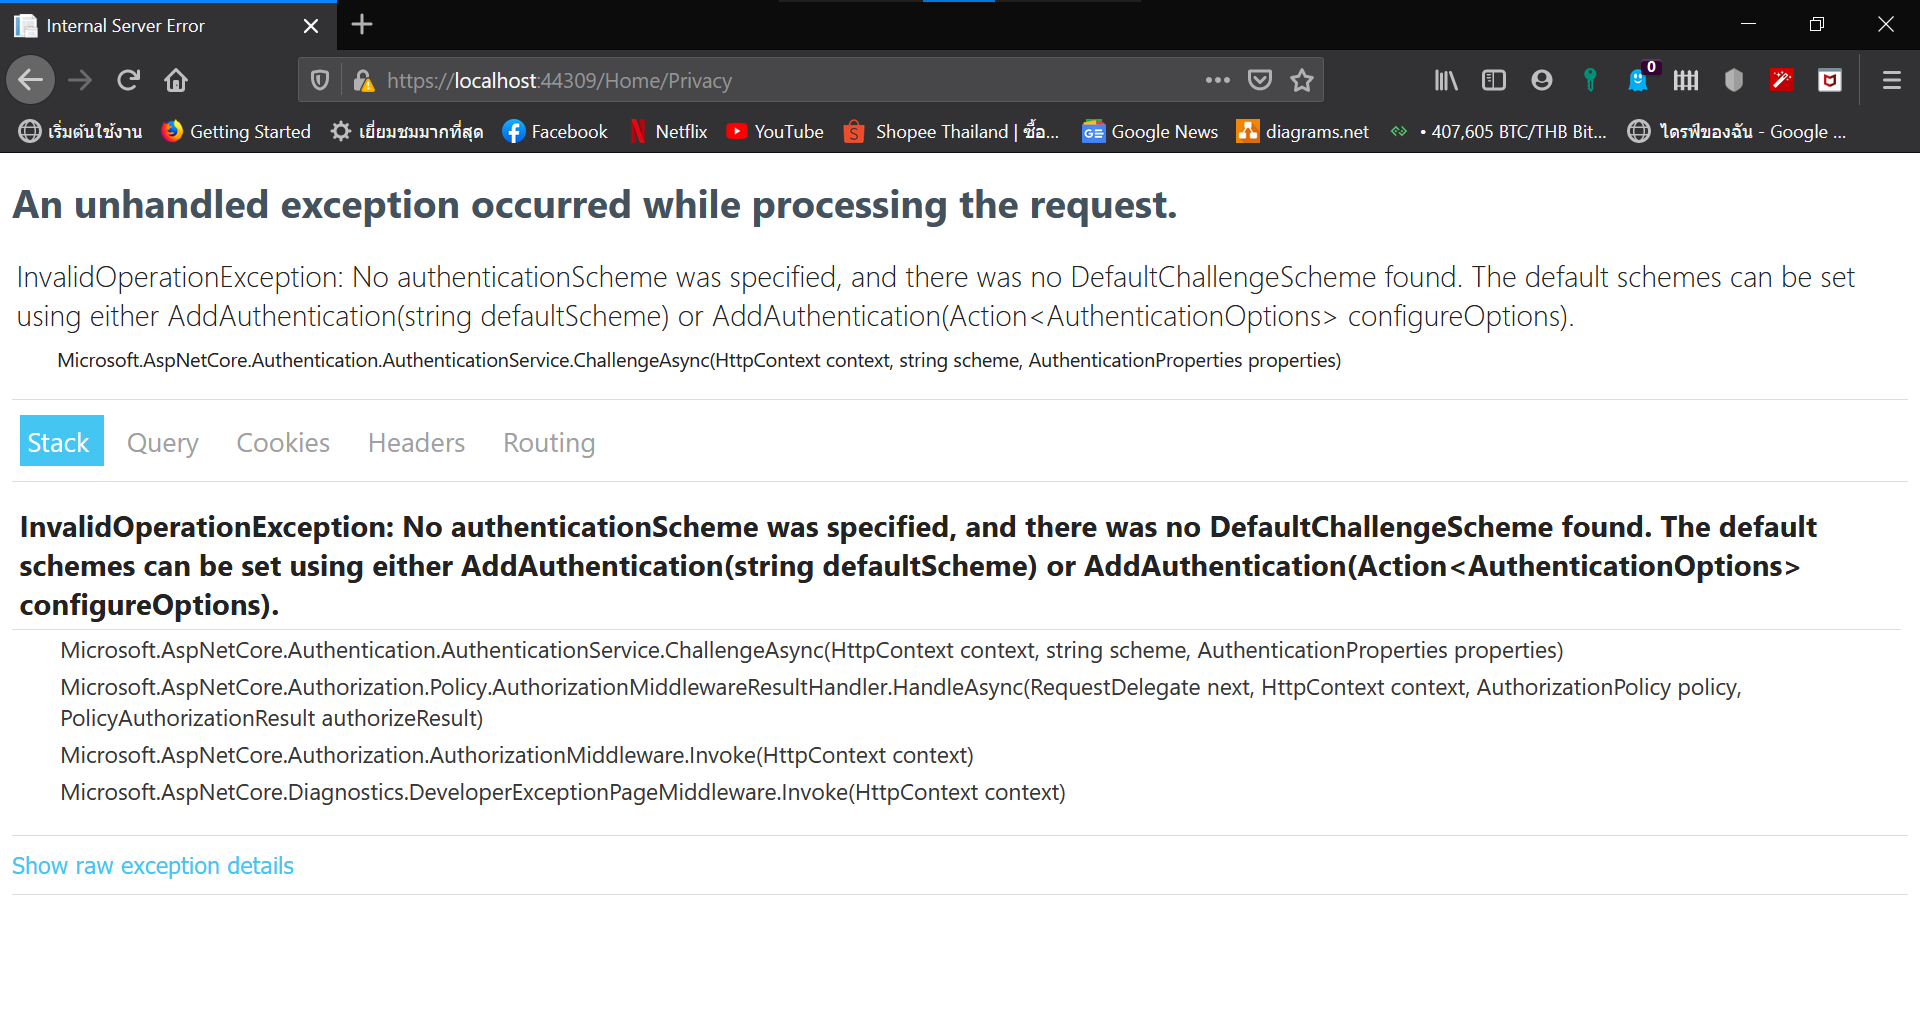
จากนั้น ทดสอบโดยการนำ [Authorize] ใส่ไว้เหนือ Method Privacy
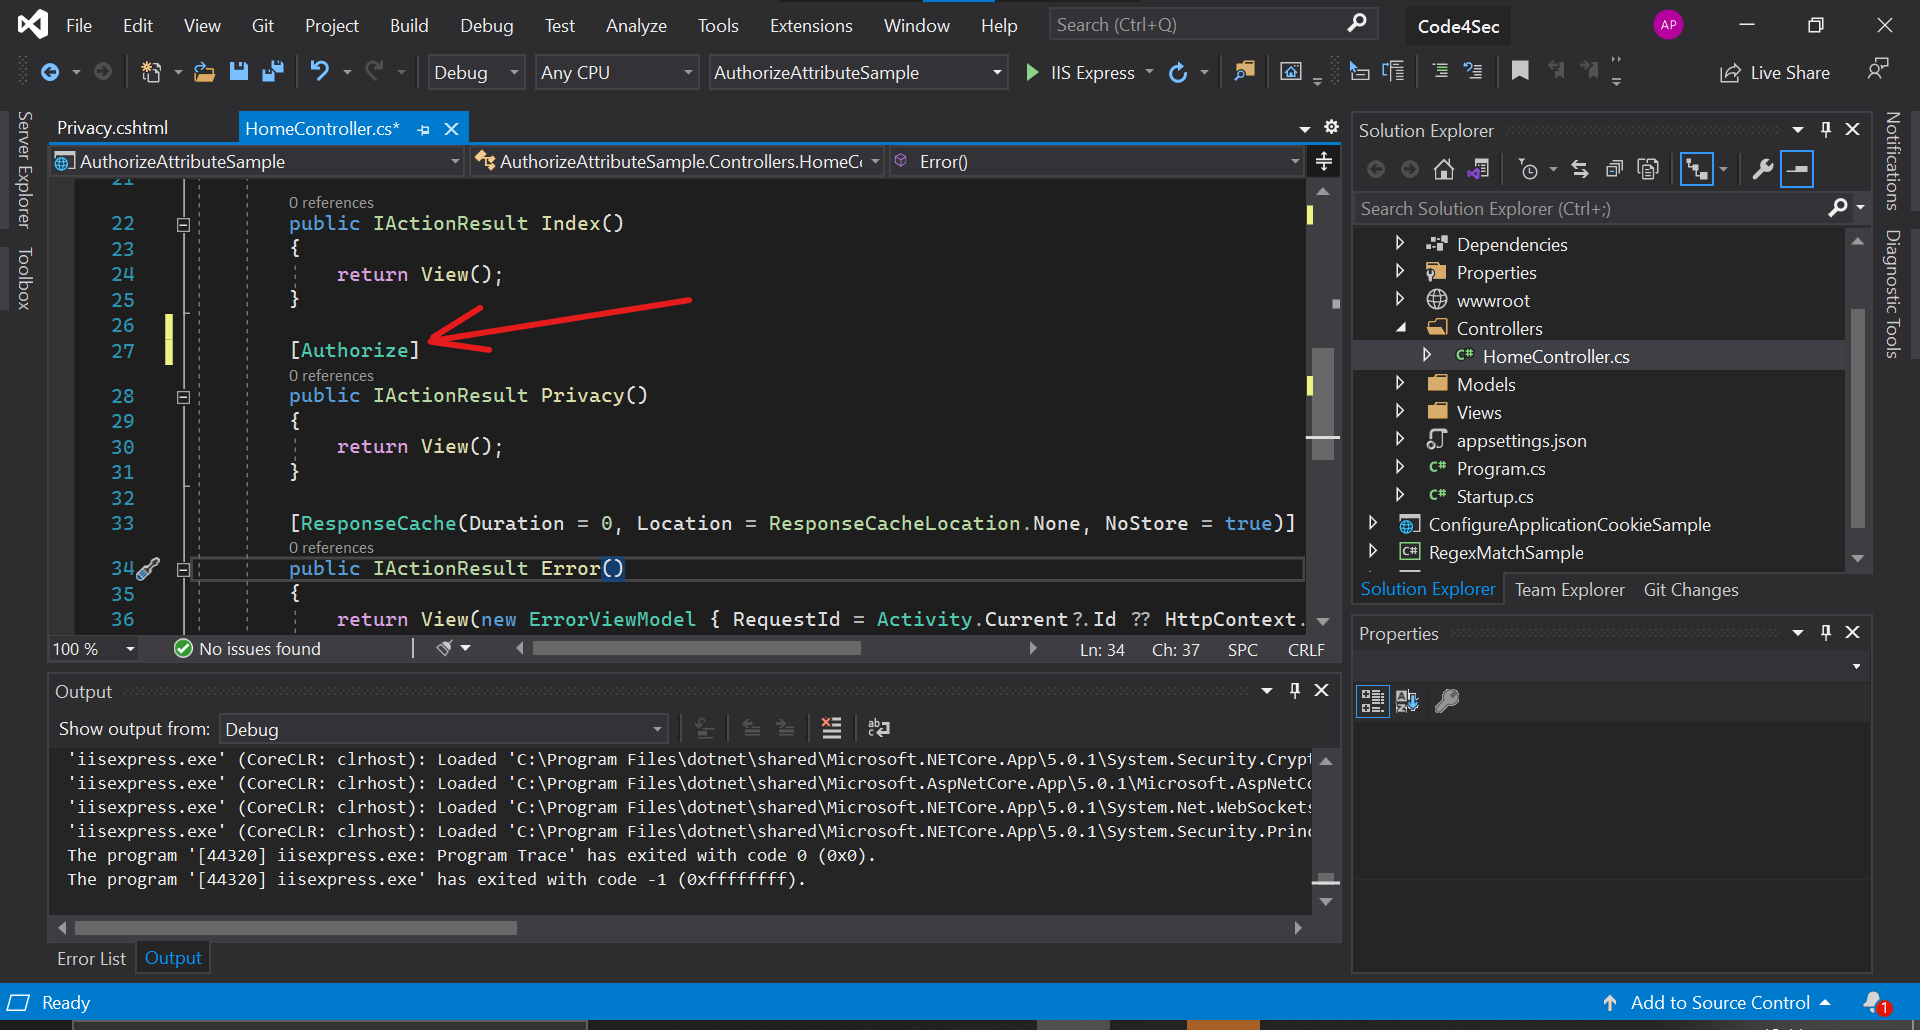
ทดสอบเข้าหน้า Privacy อีกครั้ง จะพบว่าไม่สามารถเข้าใช้งานได้ เนื่องจากไม่มีสิทธิ์ ซึ่งการระบุ [Authorize] ผู้ใช้งานระบบจะต้องมีการทำ Authentication มาก่อนระบบจึงจะรู้ว่าเป็นใคร มีสิทธิ์เป็นอะไร จาก Error code จะเห็นว่ามีการเกิด Exception No authenticationScheme was specified ซึ่งเกี่ยวกับการ Authentication นั่นเอง
Reference:
- AuthorizeAttribute Class
- Simple authorization in ASP.NET Core
- Authentication and Authorization in ASP.NET Web API
- Role-based authorization in ASP.NET Core
C# CookieOptions

2021-01-06 00:00:00 +0000
Weak Account management
การเขียนโปรแกรมในรูปแบบ Web Application ต้องมีการเก็บ State ต่างๆ ที่ Client โดยการเก็บลงใน Cookie นั่นเอง
เนื่องจาก Cookie ทำงานอยู่ฝั่ง Client ทำให้สามารถถูกเปลี่ยนแปลงแก้ไขได้ง่ายจากผู้ไม่หวังดี ดังนั้นเราจำเป็นจะต้อง Config cookie ให้มีความปลอดภัยตั้งแต่ฝั่ง Server
ใน .NET Core มี Class ให้เราได้เรียกใช้งานเพื่อ Config cookie เมื่อต้องการ Response ไปให้ Client โดยการ Config ใน Class "CookieOptions"
CookieOptions Class
Namespace: Microsoft.AspNetCore.Http
Assembly: Microsoft.AspNetCore.Http.Features.dll
ภายใน CookieOptions Class ประกอบไปด้วย Properties ให้เราใช้งานได้ ดังนี้
| Properties | |
|---|---|
| Domain | Gets or sets the domain to associate the cookie with. |
| Expires | Gets or sets the expiration date and time for the cookie. |
| HttpOnly | Gets or sets a value that indicates whether a cookie is accessible by client-side script. |
| IsEssential | Indicates if this cookie is essential for the application to function correctly. If true then consent policy checks may be bypassed. The default value is false. |
| MaxAge | Gets or sets the max-age for the cookie. |
| Path | Gets or sets the cookie path. |
| SameSite | Gets or sets the value for the SameSite attribute of the cookie. The default value is Unspecified |
| Secure | Gets or sets a value that indicates whether to transmit the cookie using Secure Sockets Layer (SSL)–that is, over HTTPS only. |
ตัวอย่างการใช้งาน CookieOptions Class
การใช้งาน เราต้อง New object ของ CookieOptions ขึ้นมาก่อนแล้วจึงกำหนด Properties ที่เราต้องการ
var cookieOptions = new CookieOptions
{
    // Set the secure flag, which Chrome's changes will require for SameSite none.
    // Note this will also require you to be running on HTTPS
    Secure = true,

    // Set the cookie to HTTP only which is good practice unless you really do need
    // to access it client side in scripts.
    HttpOnly = true,

    // Add the SameSite attribute, this will emit the attribute with a value of none.
    // To not emit the attribute at all set the SameSite property to (SameSiteMode)(-1).
    SameSite = SameSiteMode.None,

    Expires = new DateTimeOffset(DateTime.Now.AddDays(1))
};
เมื่อต้องมีการส่ง Cookie ไปยัง Client ให้ระบุ Cookie Option ที่เราได้กำหนดไว้ไปด้วย โดยใช้คำสั่ง Response.Cookies.Append(string key, string value, CookieOptions options); ดังตัวอย่างด้านล่างนี้
Response.Cookies.Append("Code4Sec", "Sample_Cookie", cookieOptions);
ทดลองรันคำสั่ง และตรวจสอบใน Browser (ในตัวอย่างจะใช้ Firefox นะครับ) โดยการกด F12 เพื่อเปิดโหมด Developer จากนั้นเปิด Tab Storage ในหัวข้อ Cookies จะพบว่ามี Cookie key "Code4Sec" ที่เราได้สั่ง Response มาจาก Server ซึ่งมี Option Secure เป็น true, HttpOnly เป็น true, SameSite เป็น None และ Expire ในวันถัดไป

Reference:
C# TryValidateModel
2021-01-05 00:00:00 +0000
Model คืออะไร?
โครงสร้างการเขียนโค้ตแบบ MVC (Model-View-Controller) การส่งผ่านข้อมูลต่างๆ ส่วนใหญ่จะอยู่ในรูปแบบของ Model
Model คือแบบจำลองหรือ Class ที่ภายในบรรจุด้วย Property ต่างๆ สำหรับใช้ในการจัดเก็บข้อมูลเป็นกลุ่มก้อน หรือในภาษา OOP จะเรียกเป็น object data เช่น ข้อมูล Personal ภายในก็จะบรรจุข้อมูลชื่อ นามสกุล ส่วนสูง น้ำหนัก อายุ แล้วเมื่อต้องการรับ - ส่งข้อมูล เราก็จะรับ - ส่งไปทั้งก้อน Personal หรือส่งทั้ง object personal นั่นเอง
ภายใน Model เราสามารถระบุ Requirement ต่างๆ ของแต่ละ Property ได้
TryValidateModel(Object) Method
Namespace: Microsoft.AspNetCore.Mvc
Assembly: Microsoft.AspNetCore.Mvc.Core.dll
TryValidateModel เป็น method overloads มีให้เลือกใช้งานหลายรูปแบบ ดังตารางด้านล่าง (รายละเอียดเพิ่มเติม)
ในบทความนี้จะเป็นตัวอย่างการใช้งาน TryValidateModel(Object)
| Overloads | |
|---|---|
| TryValidateModel(Object) | Validates the specified model instance. |
| TryValidateModel(Object, String) | Validates the specified model instance. |
TryValidateModel(Object)
ใช้ในการตรวจสอบความถูกต้องของข้อมูลใน Property ที่อยู่ใน Object นั้น
ถ้า Object valid จะ return true ถ้าไม่จะ return false
ตัวอย่าง Personal Model
using System;
using System.ComponentModel.DataAnnotations;

namespace TryValidateModelSample
{
    public class PersonalModel
    {
        [Required(ErrorMessage ="Firstname is required.")]
        [StringLength(20)]
        public string Firstname { get; set; }

        [Required(ErrorMessage = "Lastname is required.")]
        [StringLength(20)]
        public string Lastname { get; set; }

        public double Weight { get; set; }

        public double Height { get; set; }

        [Range(1,100)]
        public int Age { get; set; }
    }
}
สร้าง Object ของ Personal Model
//สร้าง Object ของ Personal Model
var objPersonal = new PersonalModel
{
    Firstname = "Athiporn",
    Lastname = "Phumnicom",
    Weight = 82.00,
    Height = 178.00,
    Age = 31
};
Validate Personal Model
ตรวจสอบความถูกต้องของ Object Personal โดยใช้ TryValidateModel(Object) Method
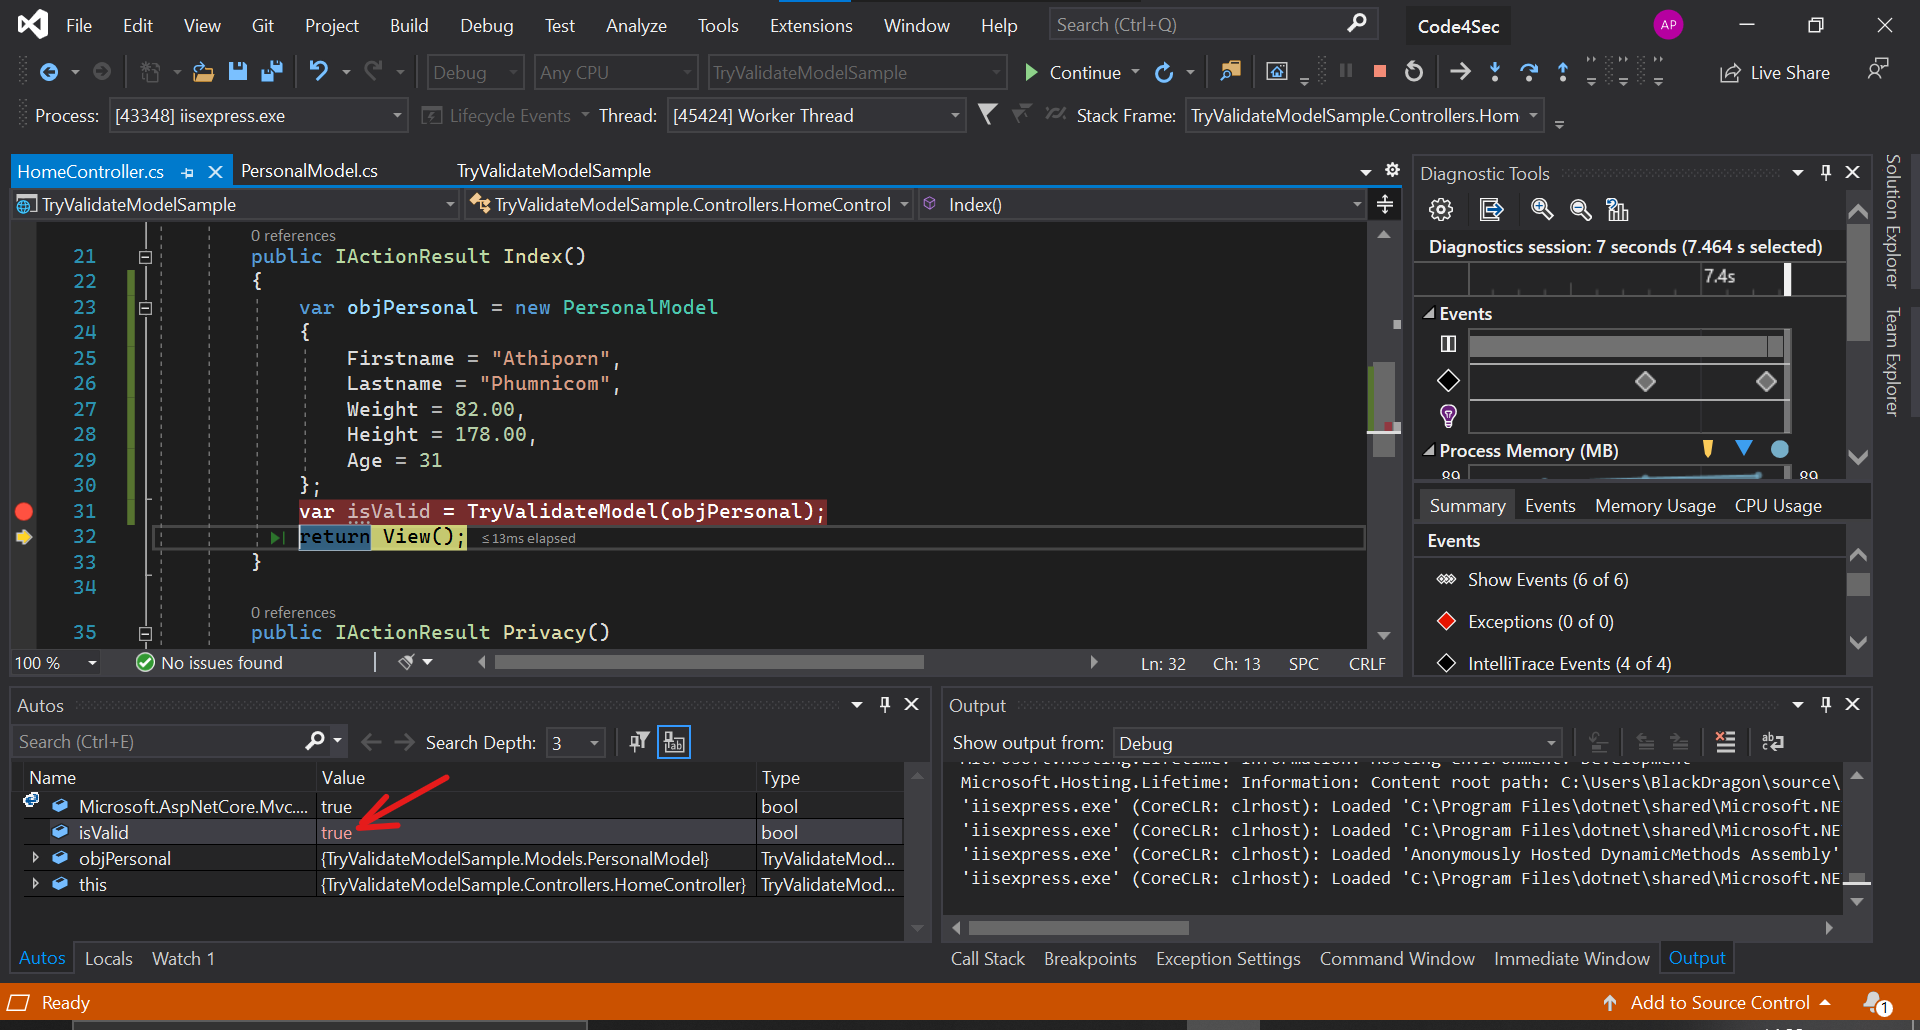
จากรูป Object "objPersonal" มีความถูกต้อง TryValidateModel จะ return ค่าเป็น true
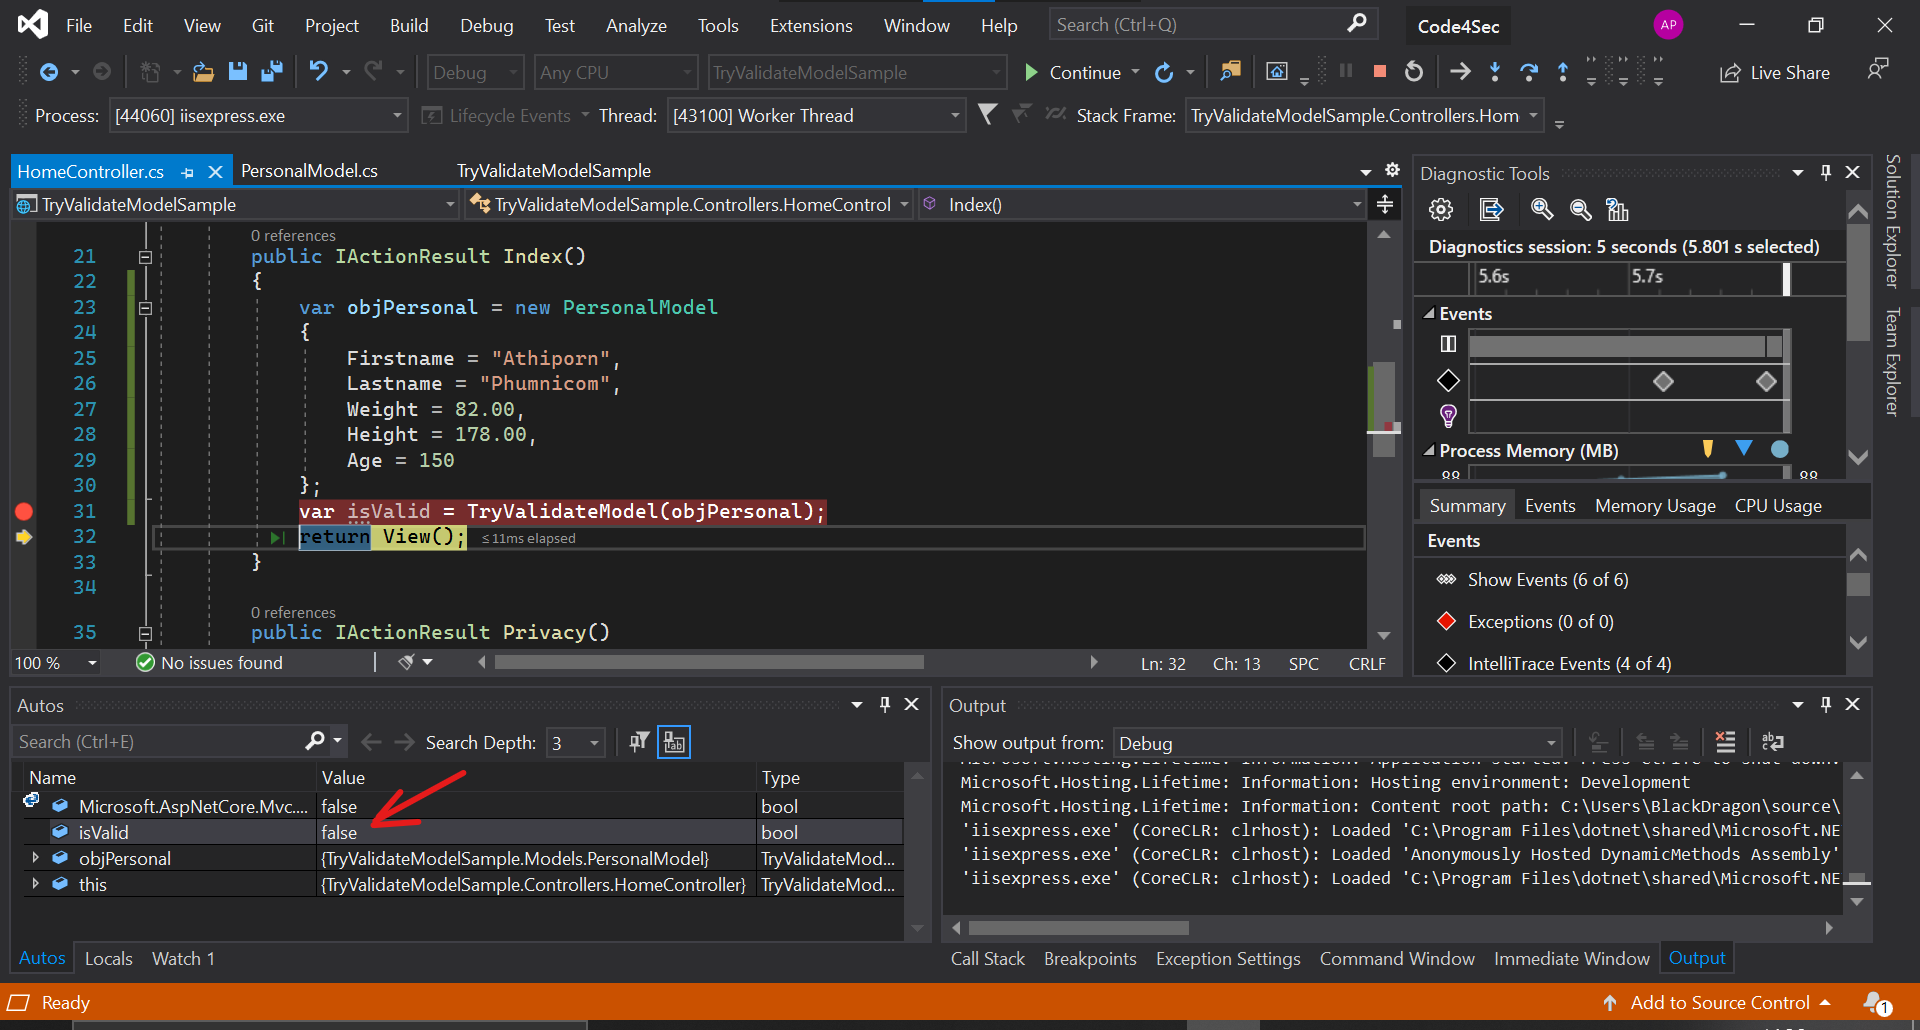
ทดลองเปลี่ยนค่า Age จาก 31 เป็น 150 ซึ่งเกินจากที่เราได้กำหนดไว้ใน Model ด้วยคำสั่ง [Range(1,100)] แล้วลอง Validate อีกครั้งด้วย TryValidateMedel จะเห็นว่า return ค่าเป็น false ดังภาพด้านล่าง
Reference:
C# Regex Match

2021-01-04 00:00:00 +0000
Regular Expressions คืออะไร?
Regular Expressions หรือเรียกย่อๆ ว่า regex ใช้ในการกำหนดรูปแบบหรือกลุ่มคำ เพื่อใช้ในการค้นหาในข้อความต่างๆ ตามที่เราต้องการ
regex สามารถใช้ในการค้นหาในรูปแบบของข้อความธรรมดา ตัวเลข หรืออักษระพิเศษ โดยเราสามารถกำหนดได้ว่าจะให้ match แค่ 1 อัน หรือ match ได้หลายๆ อัน หรือไม่ match เลยก็ได้ การนำไปประยุกต์ใช้งาน เช่น การตรวจสอบ input ว่าเป็นข้อมูลที่เราต้องการหรือไม่
regex มีให้ใช้งานในเกือบทุกภาษา แต่ในบทความนี้ขอเสนอการใช้งาน regex match ในรูปแบบของภาษา C#
Regex.Match Method
Namespace: System.Text.RegularExpressions
Assembly: System.Text.RegularExpressions.dll
Regex.Match เป็น method overloads มีให้เลือกใช้งานหลายรูปแบบ ดังตารางด้านล่าง (รายละเอียดเพิ่มเติม)
ในบทความนี้จะเป็นตัวอย่างการใช้งาน Regex.Match(String)
| Overloads | |
|---|---|
| Match(String, String, RegexOptions, TimeSpan) | Searches the input string for the first occurrence of the specified regular expression, using the specified matching options and time-out interval. |
| Match(String, Int32, Int32) | Searches the input string for the first occurrence of a regular expression, beginning at the specified starting position and searching only the specified number of characters. |
| Match(String, String, RegexOptions) | Searches the input string for the first occurrence of the specified regular expression, using the specified matching options. |
| Match(String, Int32) | Searches the input string for the first occurrence of a regular expression, beginning at the specified starting position in the string. |
| Match(String) | Searches the specified input string for the first occurrence of the regular expression specified in the Regex constructor. |
| Match(String, String) | Searches the specified input string for the first occurrence of the specified regular expression. |
Match(String)
ใช้ในการค้นหาคำหรือประโยคที่ต้องการจาก regex โดย method นี้จะ return match อันแรกที่พบใน input string
using System;
using System.Text.RegularExpressions;

namespace Code4Sec.RegexMatchSample
{
    class Program
    {
        static void Main(string[] args)
        {
            string text = "Hello! One Code4Sec Two Code4Sec Three Code4Sec";
            string pattern = @"(\w+)\s+(Code4Sec)";

            // Instantiate the regular expression object.
            Regex r = new Regex(pattern, RegexOptions.IgnoreCase);

            // Match the regular expression pattern against a text string.
            Match m = r.Match(text);
            int matchCount = 0;
            while (m.Success)
            {
                Console.WriteLine("Match" + (++matchCount));
                for (int i = 1; i <= 2; i++)
                {
                    Group g = m.Groups[i];
                    Console.WriteLine("Group" + i + "='" + g + "'");
                    CaptureCollection cc = g.Captures;
                    for (int j = 0; j < cc.Count; j++)
                    {
                        Capture c = cc[j];
                        System.Console.WriteLine("Capture" + j + "='" + c + "', Position=" + c.Index);
                    }
                }
                m = m.NextMatch();
            }
        }
    }
}
จากตัวอย่างด้านบน ได้ระบุ regular expression pattern (\w+)\s+(Code4Sec) มีความหมายดังนี้
| Pattern | Description |
|---|---|
| (\w+) | ขึ้นต้นด้วยคำอะไรก็ได้ |
| \s+ | มีช่องว่างระหว่างคำ |
| (Code4Sec) | ต้องเป็นคำว่า "Code4Sec" ในตัวอย่างได้ระบุ RegexOptions.IgnoreCase เพื่อเป็นการบอกว่าเป็นอักษรพิมพ์เล็กหรือพิมพ์ใหญ่ก็ได้ |
เมื่อ Run คำสั่งแล้วจะได้ผลลัพธ์ดังภาพ
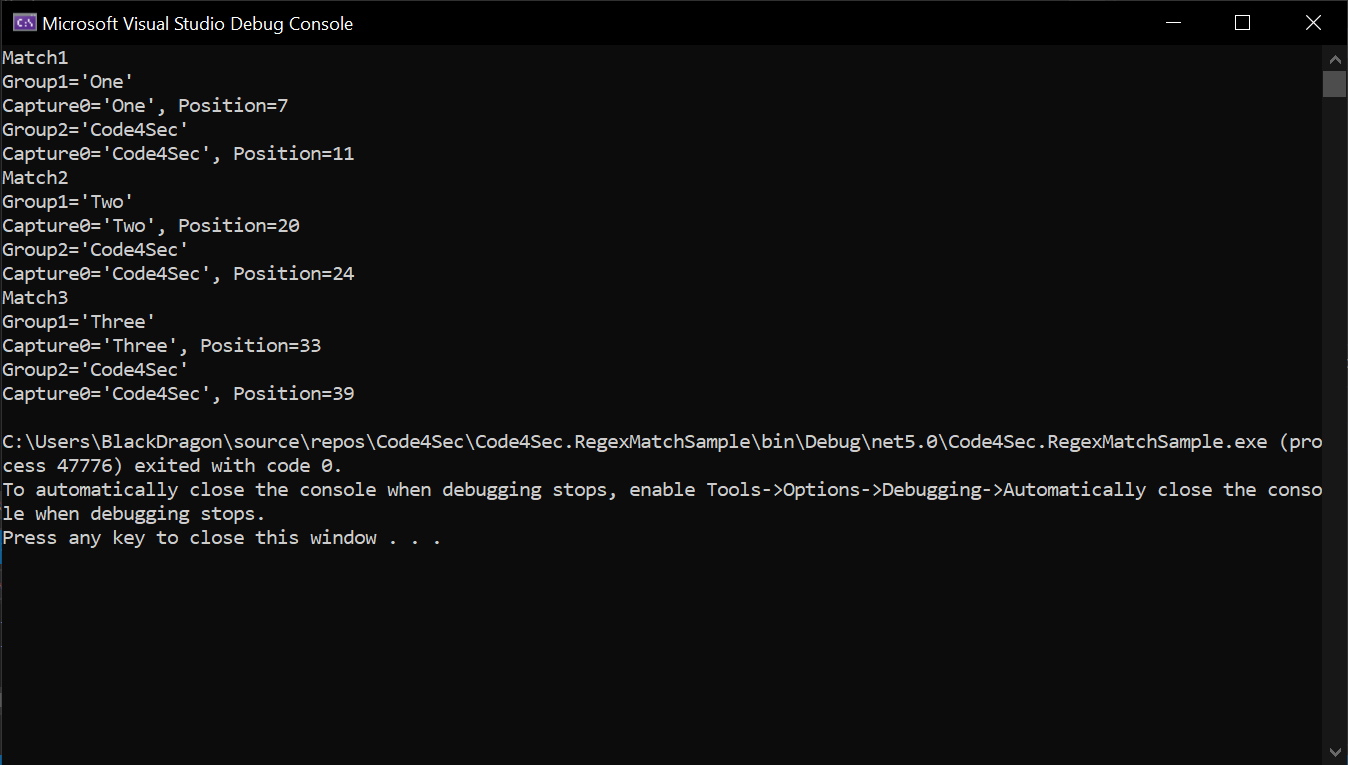
ผลลัพธ์ที่ได้จาก Match method จะ return เป็น substring แรกที่พบในประโยค
ในตัวอย่างประโยคแรกที่ match คือ "One Code4Sec" ในตัวอย่างมีการใช้ลูป while และคำสั่ง m.NextMatch() เพื่อให้หาคำที่ match ในลำดับถัดไป
Reference:
PHP Code Injection

2020-12-27 00:00:00 +0000
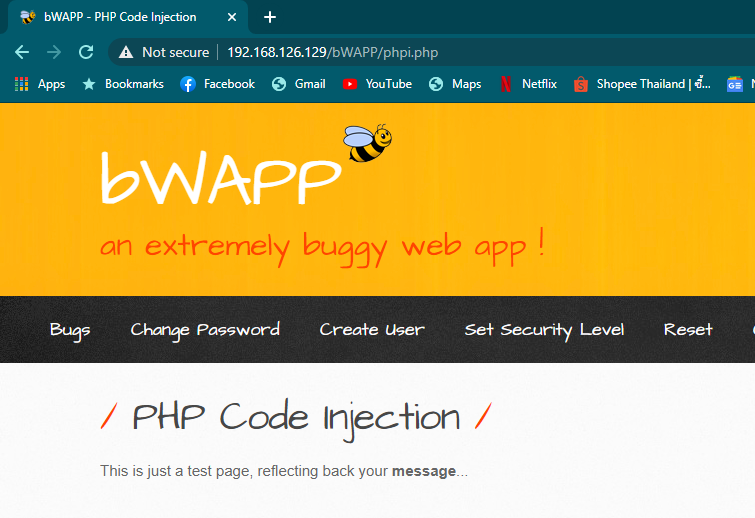
bWAPP Tutorials - PHP Code Injection
PHP Code Injection เป็นช่องโหว่ที่อนุญาตให้ Client ส่ง Code หรือคำสั่ง PHP ในรูปของ Query string ได้
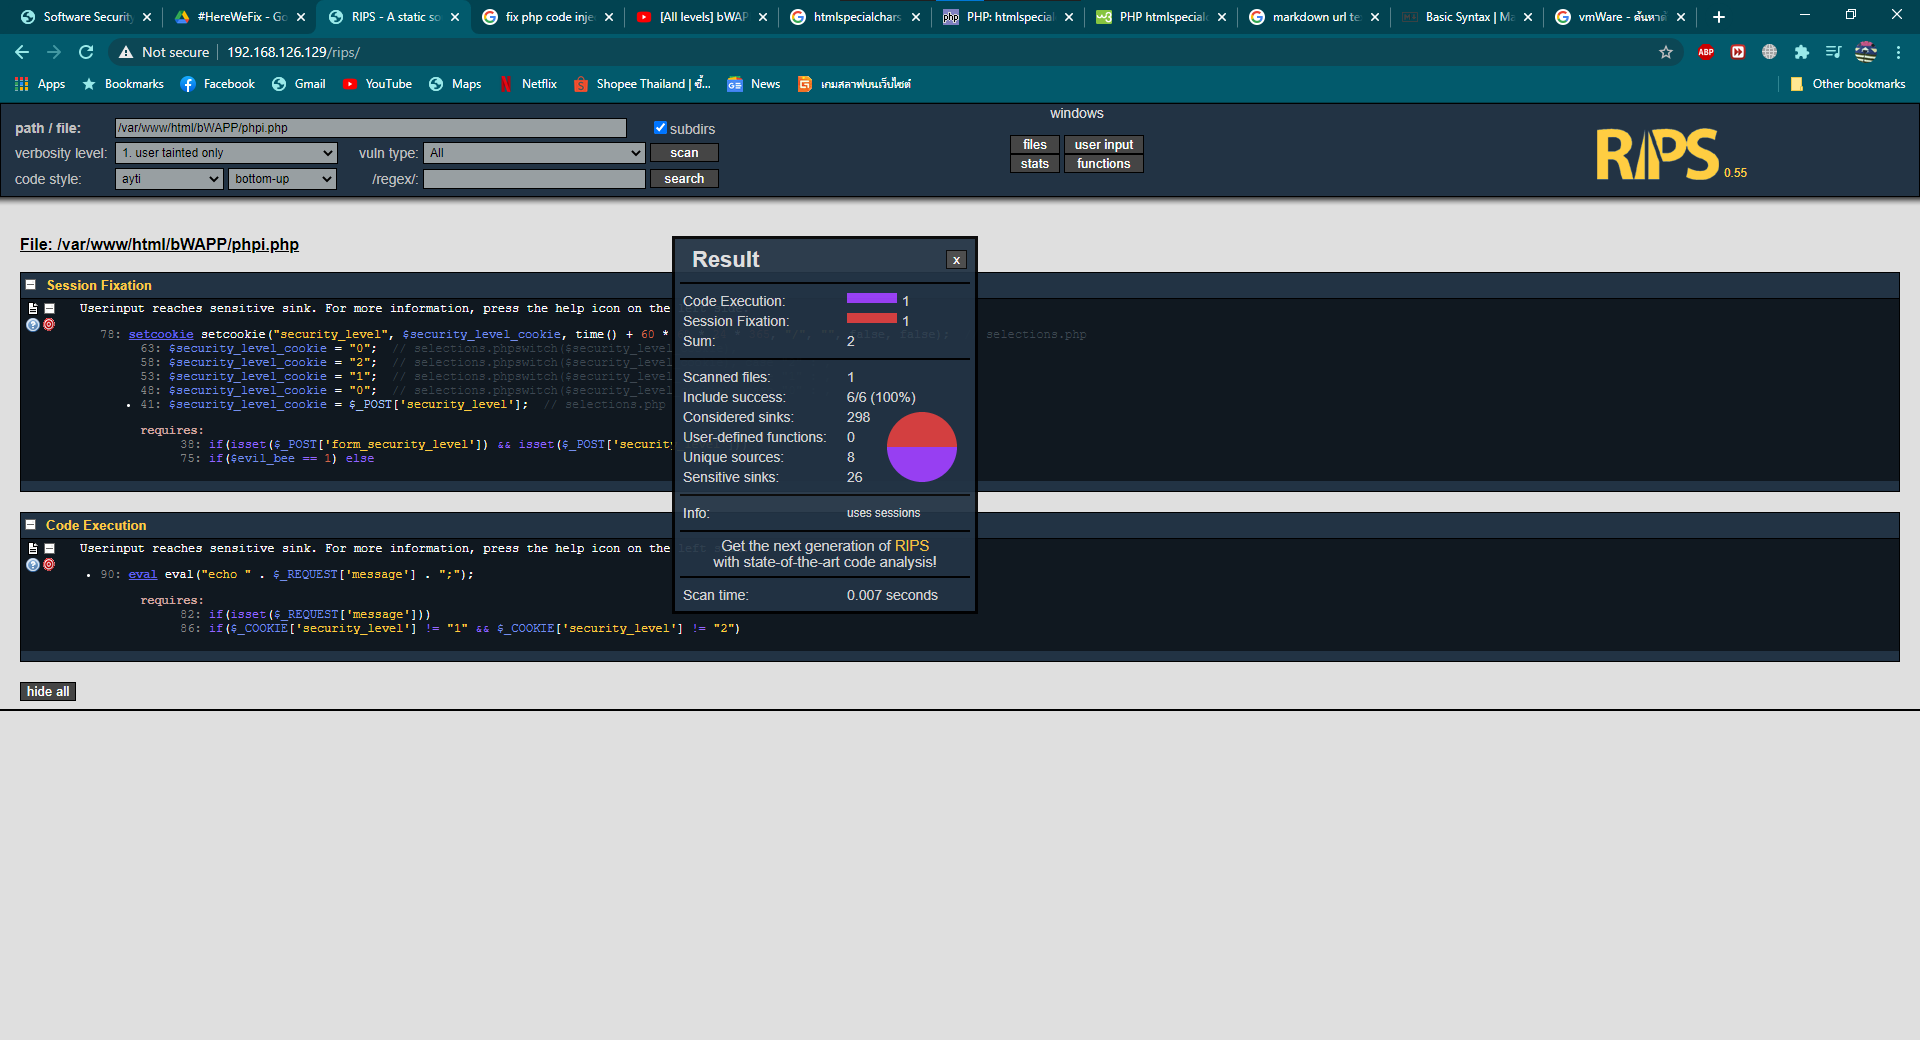
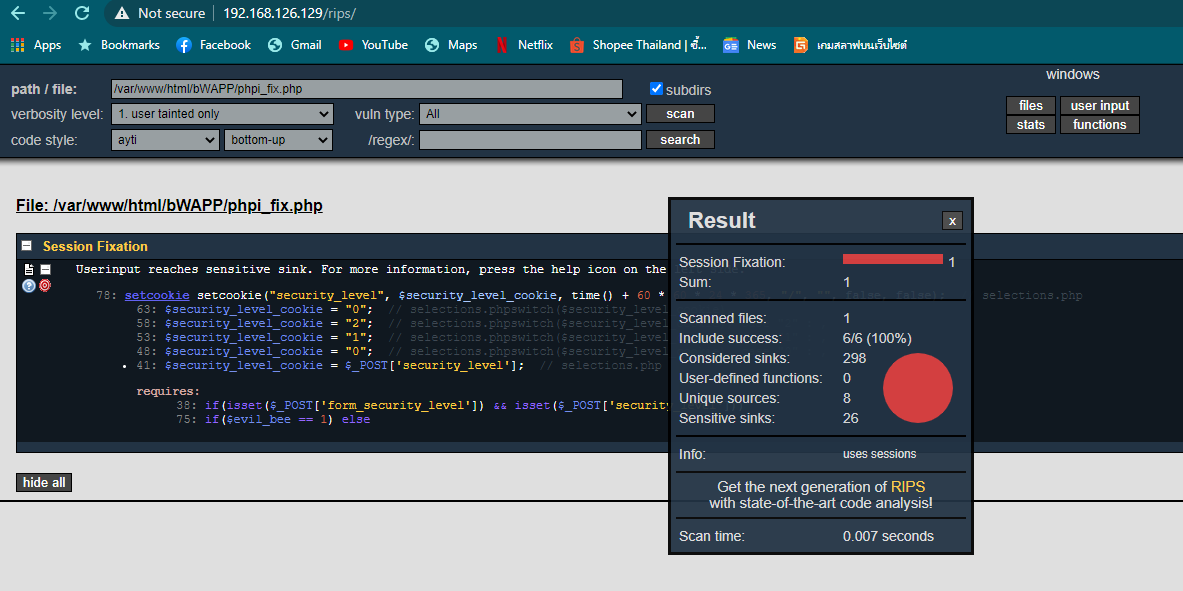
RIPS Scan
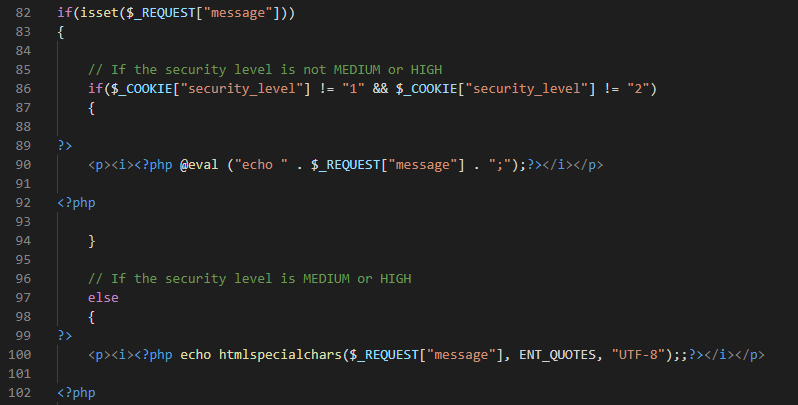
ทดสอบนำไฟล์ phpi.php ไป scan หาข่องโหว่โดยใช้เครื่องมือ RIPS ผลลัพธ์จากการ scan จะพบว่ามีช่องโหว่ในเรื่องของ Code Execution ในบรรทัดที่ 90 ของไฟล์
วิธีการทดสอบช่องโหว่ PHP Code Injection ใน bWAPP
(จากตัวอย่าง ip ที่ใช้ในการทดสอบจะเป็น 192.168.126.129 เนื่องจากทำการทดสอบใน VMware)
-
เข้าไปที่ url http://192.168.126.129/bWAPP/phpi.php
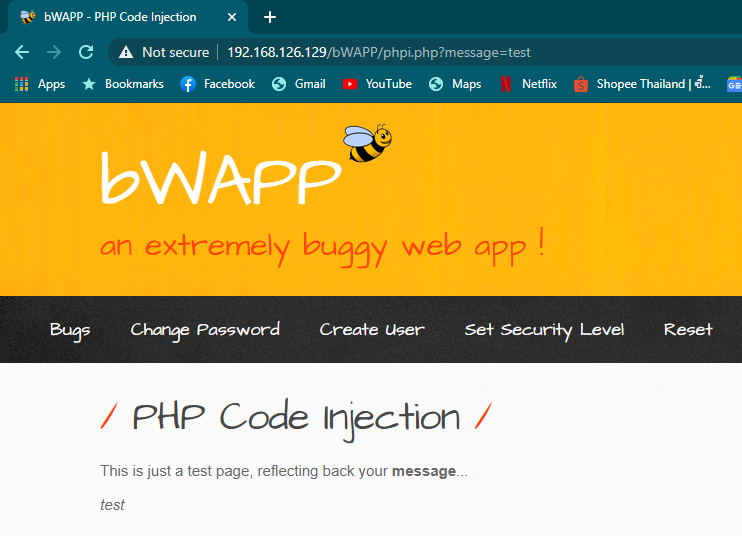
-
คลิกที่คำว่า message ระบบจะแสดงผลคำว่า test ออกมาที่บรรทัดล่าง ดังรูปตัวอย่างด้านล่าง
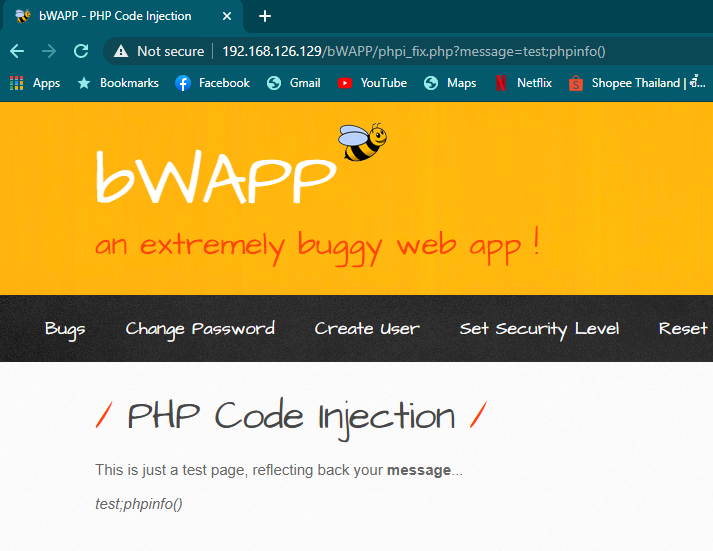
-
ทดสอบโดยการ Injection ผ่านทาง Query string จะเห็นว่าสามารถส่งคำสั่ง PHP เข้าไปได้ ในที่นี้ทดสอบด้วยคำสั่ง phpinfo โดยการเพิ่ม ;phpinfo() ต่อท้าย url

วิธีการปิดช่องโหว่ PHP Code Injection
-
จากตัวอย่างไฟล์ phpi.php
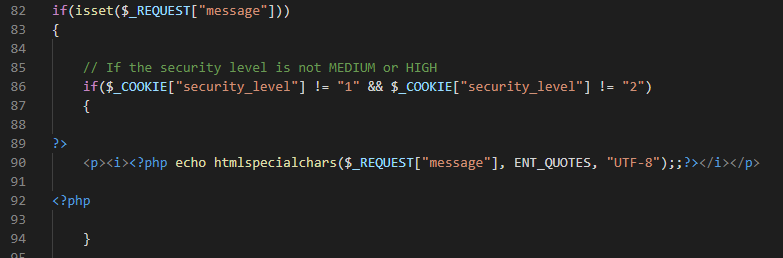
-
ทำการแก้ไขคำสั่งบรรทัดที่ 90 โดยใช้ function htmlspecialchars() ของภาษา PHP ในการช่วยแปลงอักขระพิเศษให้ในอยู่ในรูปแบบของ HTML string แล้ว Save เป็นไฟล์ใหม่ชื่อ phpi_fix.php เพื่อทดสอบบน Server
-
ทดสอบ Scan ไฟล์ phpi_fix.php ด้วย RIPS อีกครั้ง จะพบว่าช่องโหว่ Code Execution ได้หายไปแล้ว
-
ทดสอบ Injection ที่หน้าเว็บ จะพบว่าคำสั่ง PHP ที่ส่งเข้าไปจะถูกแปลงเป็นข้อความธรรมดา
Members
- Athiporn Phumnicom
- Phureephat Sottiratanapan
Digital Signature Verification

2020-12-26 00:00:00 +0000
Digital Signature Verification
Digital Signature คือลายเซ็นที่อยู่ในรูปแบบของอิเล็กทรอนิกส์ ที่มีคุณสมบัติด้านความปลอดภัยเพื่อให้มีความน่าเชื่อถือมากยิ่งขึ้น ประกอบด้วย
- Signer Authentication เป็นความสามารถในการพิสูจน์ว่าใครเป็นคนเซ็นเอกสาร ตัวลายเซ็นจะสามารถใช้ในการเชื่อมโยงไปยังบุคคลที่เซ็นเอกสารได้
- Data Integrity เป็นความสามารถในการตรวจสอบ หรือพิสูจน์ได้ว่ามีการแก้ไขเอกสารหลังจากที่ได้มีการเซ็นไปแล้วหรือไม่
- Non-repudiation การไม่สามารถปฏิเสธความรับผิดชอบได้ เนื่องจากลายเซ็นที่สร้างขึ้นมีเอกลักษณ์ สามารถพิสูจน์ในชั้นศาลได้ว่าใครเป็นผู้เซ็นเอกสาร
หลักการทำงานของ Digital Signature
การทำงานของ Digital Signature แบ่งการทำงานเป็น 2 ส่วนด้วยกันคือ ผู้ส่งและผู้รับ เมื่อผู้ส่งได้เขียนข้อมูลลงในอีเมล์เป็นที่เรียบร้อยแล้ว ระบบจะทำการแปลงไฟล์อีเมล์ที่เป็นไฟล์ Document เพื่อหาค่า Hash Value ด้วย Hash Algorithm
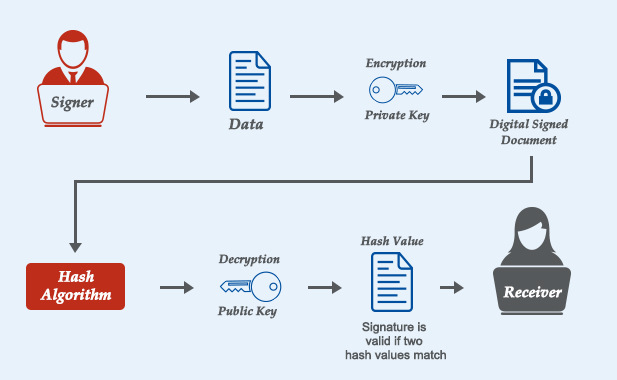
หลังจากได้ค่า Hash Value เป็นที่เรียบร้อยแล้วก็นำค่านี้มาใส่กุญแจของผู้ส่งด้วยการเข้ารหัสแบบ Asymmetric ซึ่งหลังเสร็จกระบวนการนี้ก็จะได้เป็นลายเซ็นดิจิตอล (Digital Signature) หลังจากนั้นอีเมล์จะส่งไปยังผู้รับ ซึ่งผู้รับเองจะได้รับอีเมล์แยกออกเป็น 2 ส่วนด้วยกันคือ ส่วนของกุญแจที่ทางผู้ส่งได้ส่งมาให้ด้วยกับไฟล์เอกสาร (Document) ซึ่งกระบวนการแรกระบบจะนำกุญแจที่ส่งมาด้วยทำการถอดรหัสแบบ Asymmetric ให้ได้ค่า Hash Value เสียก่อนหลังจากได้ค่า Hash Value ที่ได้จากกุญแจเป็นที่เรียบร้อยแล้ว ระบบก็จะทำการหาค่า Hash Value จากไฟล์เอกสารที่ส่งมาด้วย ด้วยการหาค่าจาก Hash Algorithm เมื่อได้ค่า Hash Value จากไฟล์เอกสารและกุญแจหรือ Digital Signature แล้วก็นำค่า Hash Value มาเปรียบเทียบกัน ถ้าค่า Hash Value ถูกต้อง เอกสารนั้นก็จะสามารถเปิดอ่านได้ แต่ถ้าไม่ผู้รับก็จะไม่สามารถเปิดดูเอกสารนั้นได้ เนื่องจากอีเมล์ที่ส่งไปอาจจะมีการดัดแปลงแก้ไขเนื้อหาระหว่างทางส่งก็เป็นไปได้
ประโยชน์ของ Digital Signature
ซึ่งระบบนี้มีประโยชน์อย่างมากเรื่องความปลอดภัยและช่วยสร้างความมั่นใจให้กับผู้ใช้งานเป็นอย่างมาก โดยเราสามารถแบ่งออกมาเป็นข้อ ๆ ดังนี้
- เรื่องความปลอดภัยถือว่ามีความปลอดภัยในระดับที่สูง พร้อมกันนั้นยังได้รับการรับรองจากองค์กรกลาง (Certification Authority – CA) ทำการรับรอง Digital Signature อีกด้วย ซึ่งทำให้ผู้ใช้มีความมั่นใจในความถูกต้องและความปลอดภัยอย่างมาก
- การปลอมแปลง Digital Signature นั้นเป็นเรื่องที่ทำได้ยากเพราะถ้าเอกสารที่ส่งไปแปลงค่า Hash Value ไม่เท่ากันแล้วเอกสารนั้นก็จะเปิดไม่ได้เลย
- เมื่อใช้ Digital Signature เอกสารก็จะไม่ถูกเปิดอ่านหรือแก้ไขระหว่างทางที่ส่งมาอย่างแน่นอน
- ระยะทางในการส่งไม่ใช่ปัญหาสำหรับการส่งอีเมล์แบบ Digital Signature อย่างแน่นอนจากประโยชน์ที่กล่าวมาทำให้การส่งอีเมล์และเอกสารแบบ Digital Signature เป็นระบบที่ได้รับความน่าเชื่อถืออย่างมากสำหรับผู้ที่ต้องการความถูกต้องและต้องการความเป็นส่วนตัว
Reference
Facebook Two-Factor Authentication
2020-12-20 00:00:00 +0000
Two-Factor Authentication บน Facebook
ในปัจจุบันเกิดความไม่ปลอดภัยจากการเข้าสู่ระบบโดยไม่ได้รับอนุญาต ทำให้เกิดความเสียหายเป็นอย่างมาก ยิ่งถ้าเป็น Page ของลูกค้าที่เราดูแล ยิ่งส่งผลกระทบหนัก สาเหตุส่วนใหญ่เกิดจากการโดน Phishing หรือการที่มีผู้ไม่ประสงค์ดี สร้างเว็บปลอมขึ้นมา เพื่อหลอกให้เรากรอกข้อมูลลงไป
การตั้งค่าแบบ Two-Factor Authentication ก็จะช่วยให้บัญชีของเรามีความปลอดภัยมากยิ่งขึ้น
Two-Factor Authentication คือ การยืนยันตัวตนเพื่อเข้าสู่ระบบด้วย 2 ขั้นตอน โดยปกติแล้วตอนที่เรา Login เข้าระบบ ทุกคนก็จะกรอก username และ password เพื่อยืนยันตัวตน แต่การ Login ลักษณะนี้ จะมีความปลอดภัยค่อนข้างน้อย
การยืนยันตัวตนชั้นที่ 2 นอกจากการใส่ password ก็มีหลายวิธี ขึ้นอยู่กับระบบที่เราใช้งาน เช่น การส่ง OTP ผ่าน SMS, การใช้ลายนิ้วมือ เป็นต้น
การเปิดใช้งาน Two-Factor Authentication บน Facebook มีขั้นตอนดังนี้
-
ไปที่ ตั้งค่า จากนั้นเลือก การรักษาความปลอดภัยและการเข้าสู่ระบบ และเลือกหัวข้อ ใช้การยืนยันตัวตนแบบสองชั้น

-
เลือกว่าต้องการ การยืนยันตัวตนแบบสองชั้นแบบใด ในที่นี้ เลือกแบบ แอพยืนยันตัวตน จากนั้นทำการ สแกน QR CODE เพื่อเข้าสู่การ Authentication

-
เมื่อสแกน QR Code แล้ว ก็นำรหัสที่ได้ ไปกรอกในขั้นตอนต่อไป

-
เปิดการใช้งาน การยืนยันตัวตนแบบสองชั้น เรียบร้อย

Members
- Athiporn Phumnicom
- Phureephat Sottiratanapan
Cookie expire test case

2020-12-13 00:00:00 +0000
Cookie Expire Test Case
Preconditions:
Set cookie 30 minutes.
Input:-
Actions:
- Login.
- Wait for 31 minutes.
Expected results: Cookies must expire and login again.
Members
- Athiporn Phumnicom
- Phureephat Sottiratanapan
Gpg4win
2020-12-06 00:00:00 +0000
Gpg4win Check digital signature
ขั้นตอนวิธีการตรวจสอบ Digital Signature ของโปรแกรม Gpg4win มีดังนี้
(วิธีนี้ใช้ในกรณีที่มีการติดตั้งโปรแกรม Gpg4win ในเครื่องอยู่แล้ว)
OpenPGP signatures
-
Download Gpg4win 3.1.14.exe
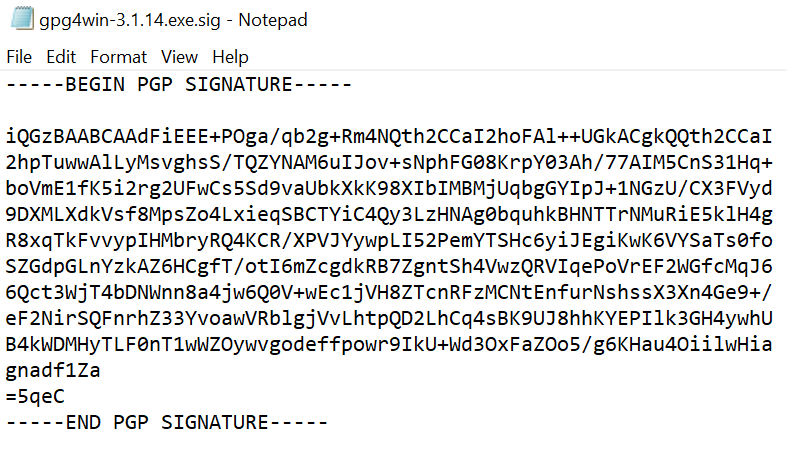
-
Download gpg4win-3.1.14.exe.sig เป็นไฟล์ที่ผ่านการ Sign แล้ว ภายในจะบรรจุข้อมูลของ PGP Sign ไว้ ดังรูปด้านล่าง
-
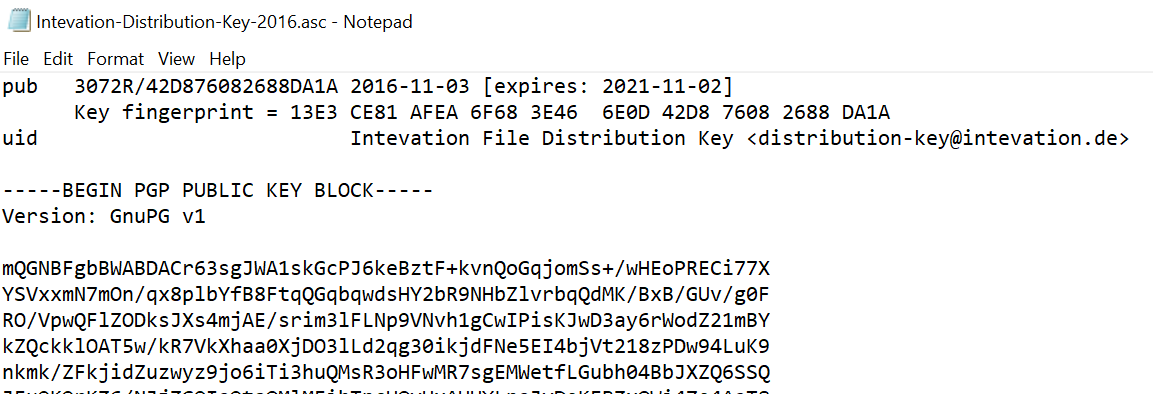
Download public OpenPGP key (aka certificate) จะได้เป็นไฟล์นามสกุล .asc ภายในจะบรรจุข้อมูล Public key และวันที่หมดอายุไว้ ดังรูปด้านล้าง
-
จะได้ไฟล์ทั้งหมดดังรูปด้านล่าง

-
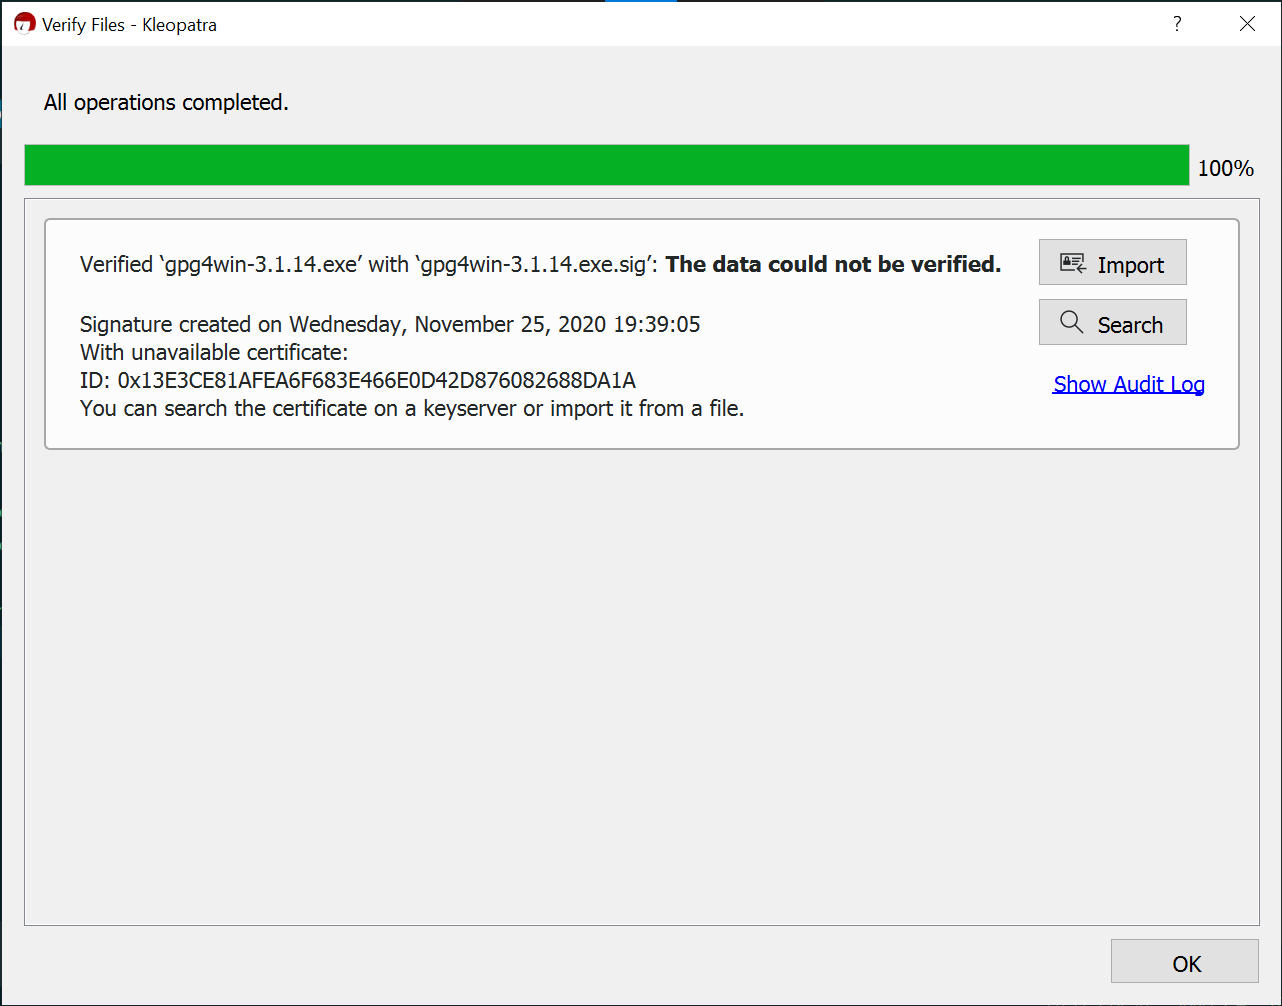
การตรวจสอบ Signature สามารถทำได้ผ่านทาง File Explorer โดยการคลิกขวาที่ไฟล์ Gpg4win 3.1.14.exe แล้วเลือก GpgEX options -> verify

5.1 จะพบหน้าจอ Verify Files ให้กด Search
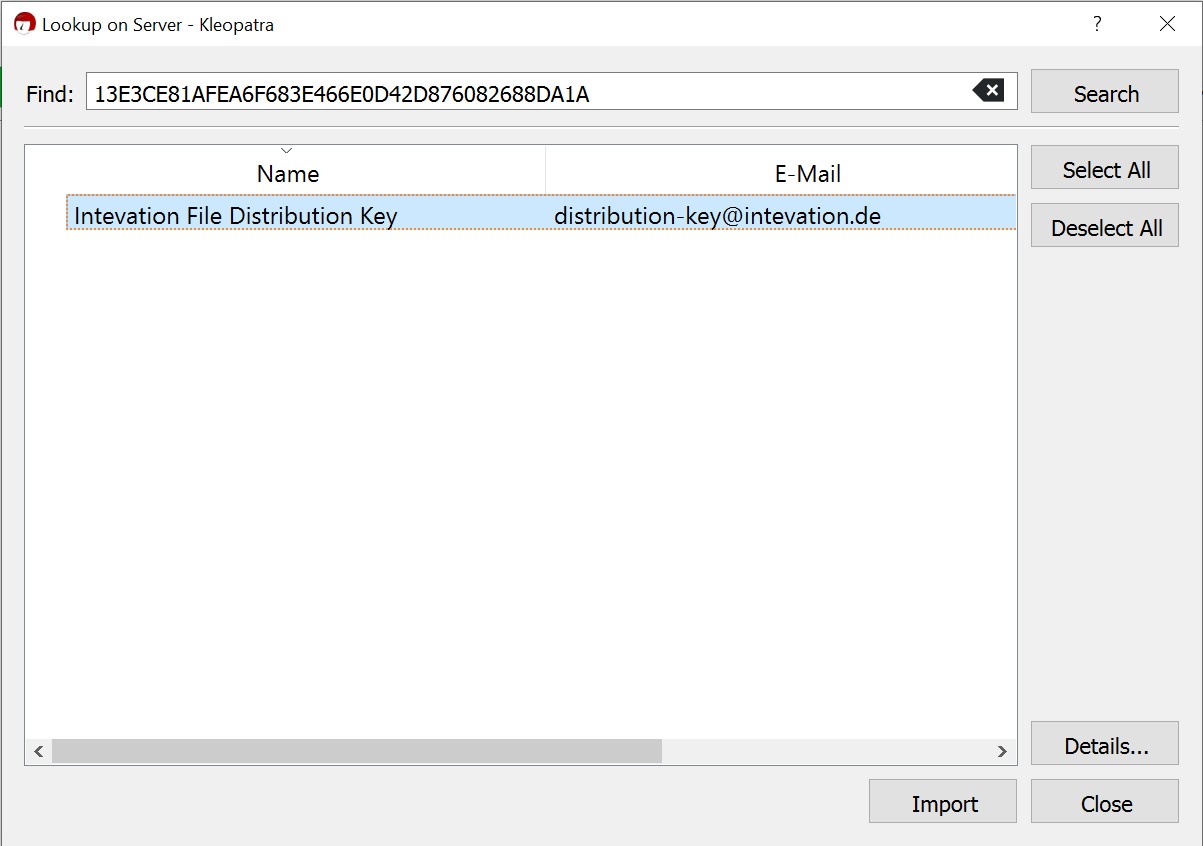
5.2 เลือก Intevation File Distribution Key แล้วกด Import
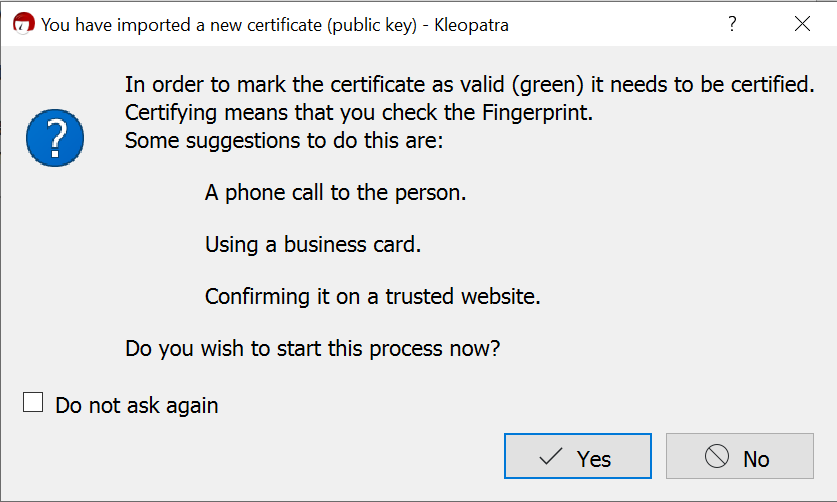
5.3 จะแสดง Popup ให้เรา Trust website โดยการกด Yes
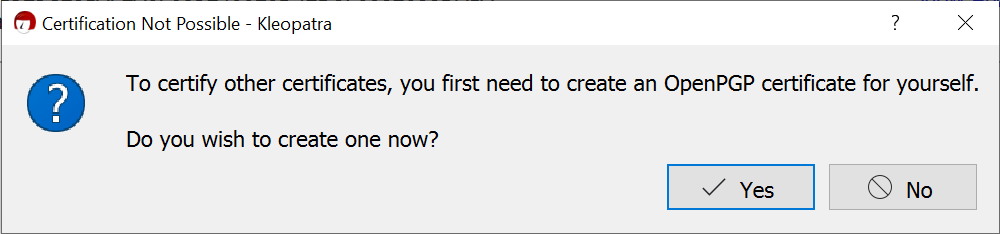
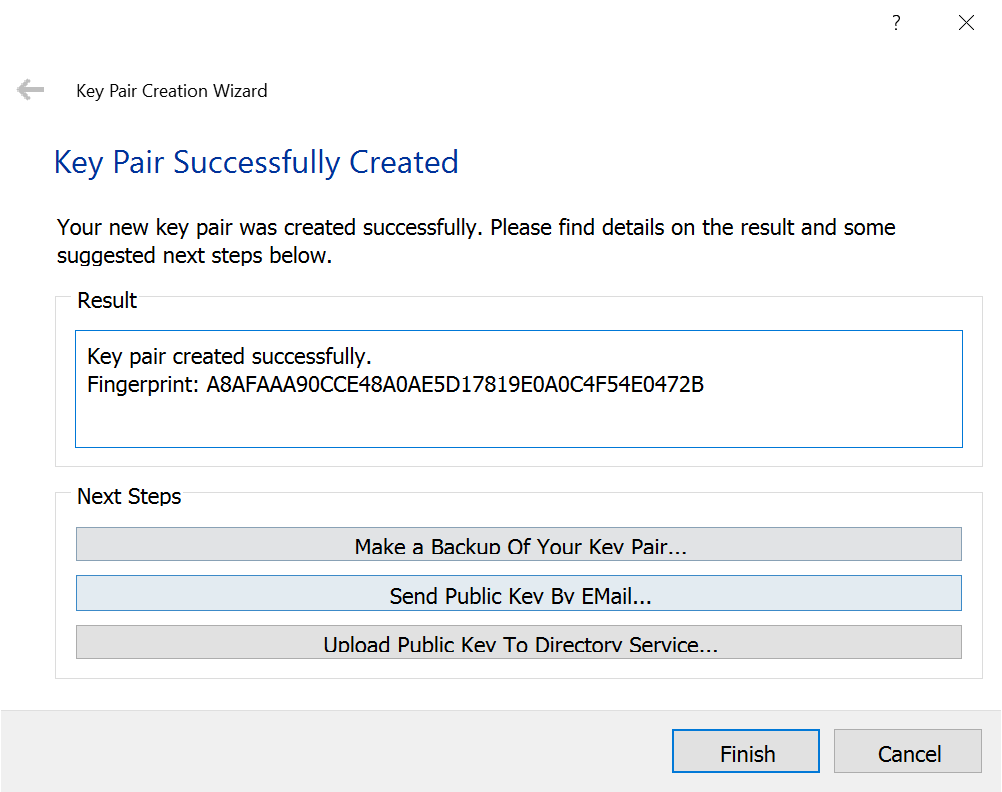
5.4 กด Yes เพื่อทำการ Create OpenPGP Certificate
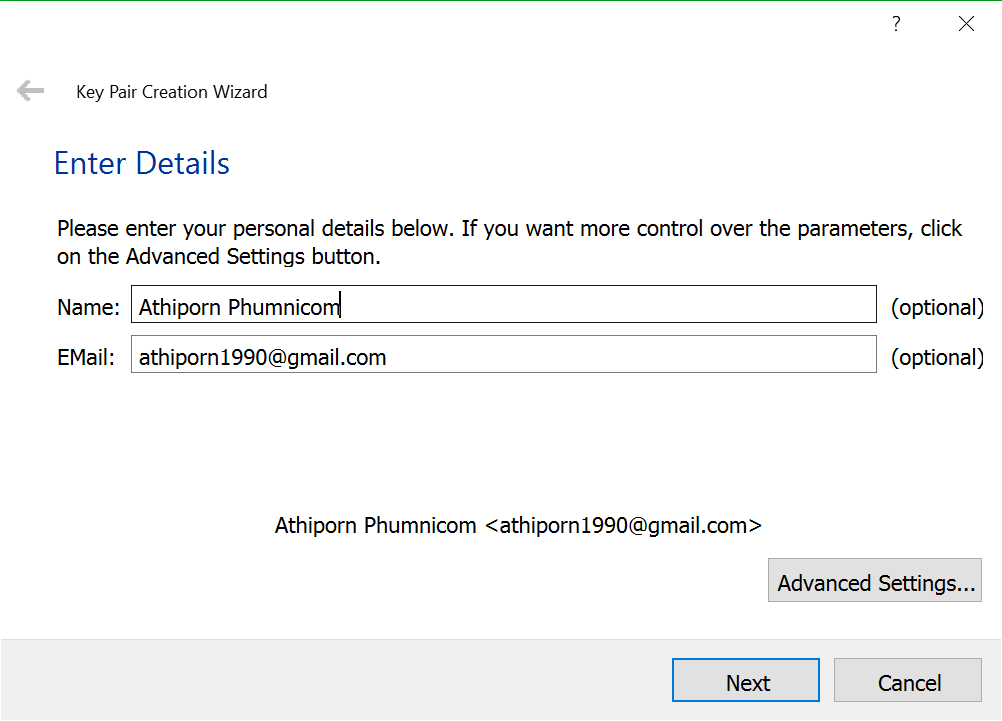
5.5 จะแสดง Popup ให้กรอก Personal details แล้วกด Next
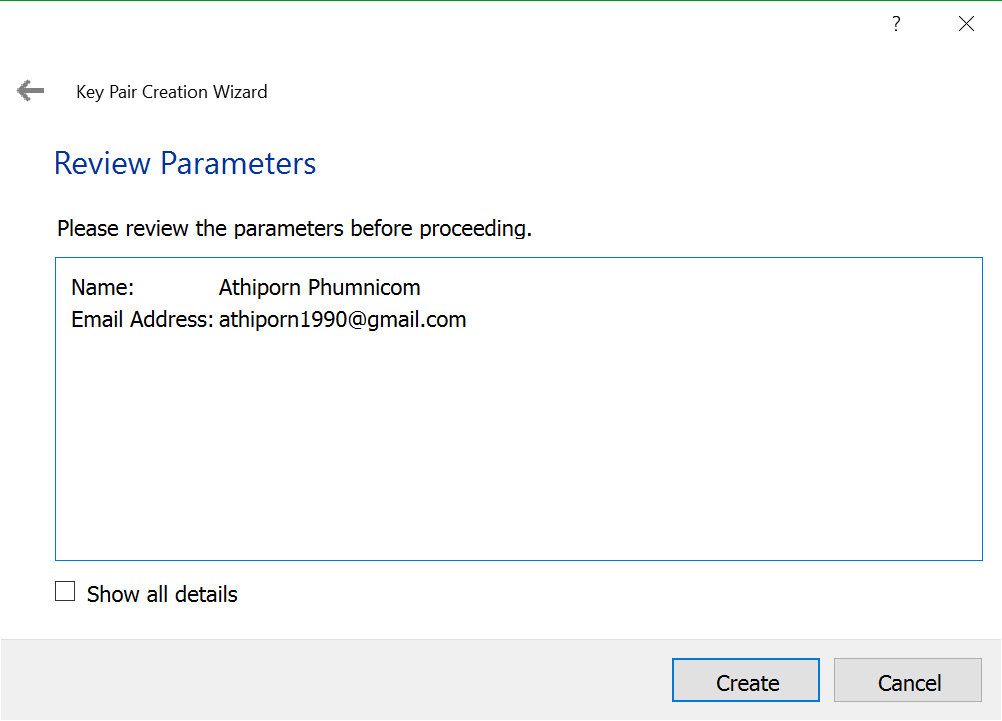
5.6 กด Create
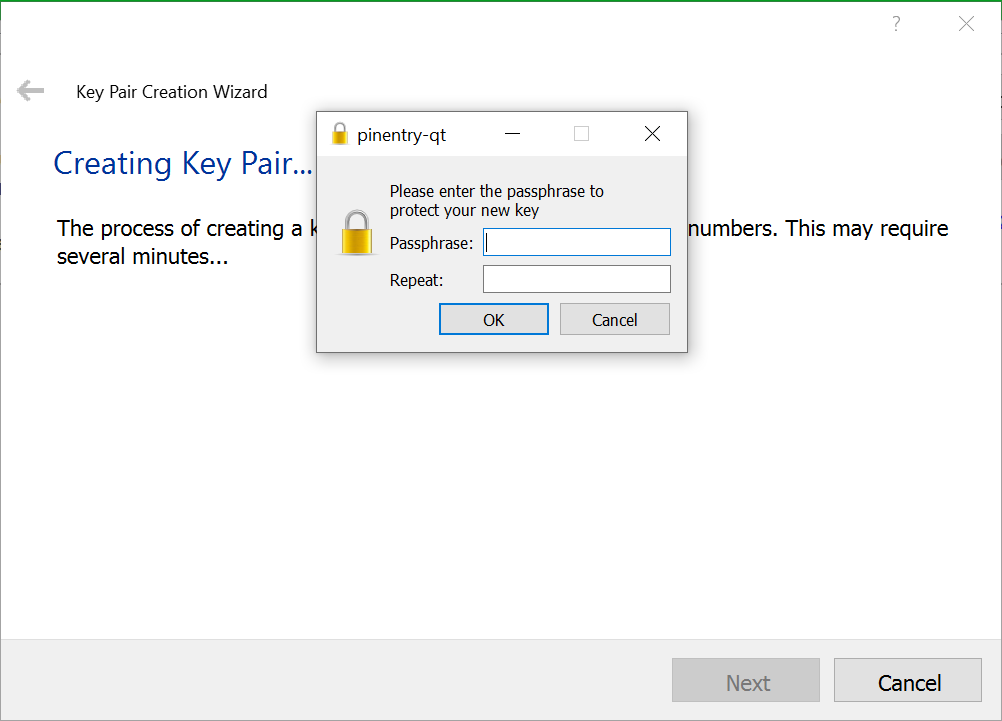
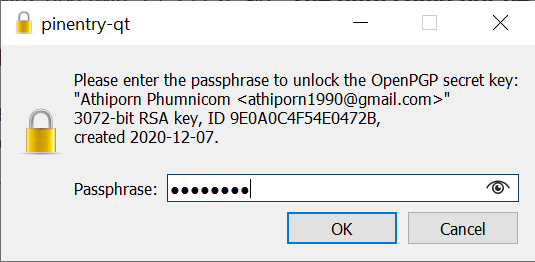
5.7 กำหนด Passphrase แล้วกด OK
5.8 กด Finish
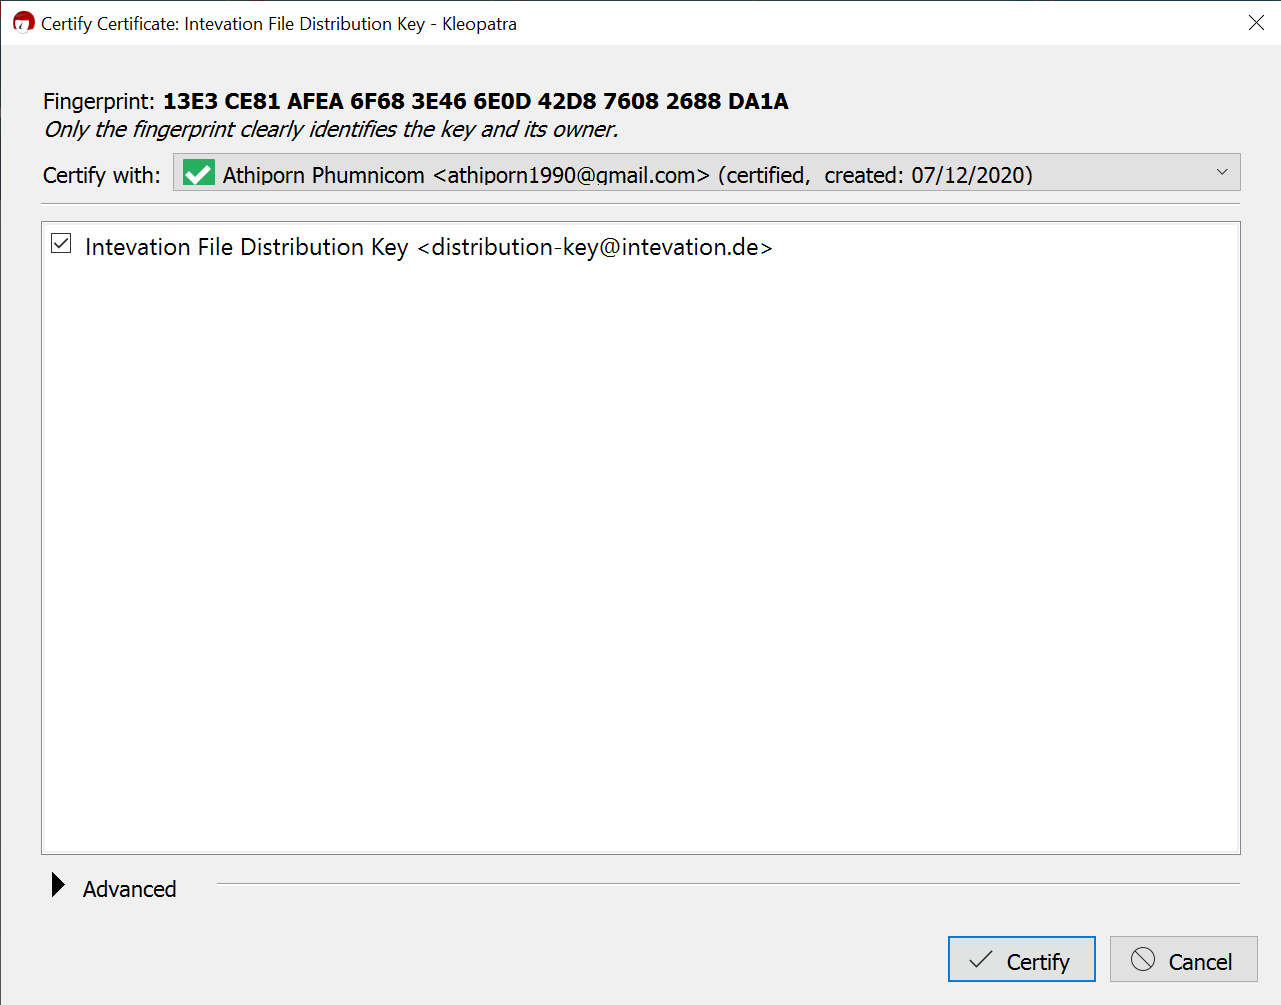
5.9 กด Certify
5.10 กรอก Passphrase ที่ได้กำหนดไว้ตอนแแรก แล้วกด OK
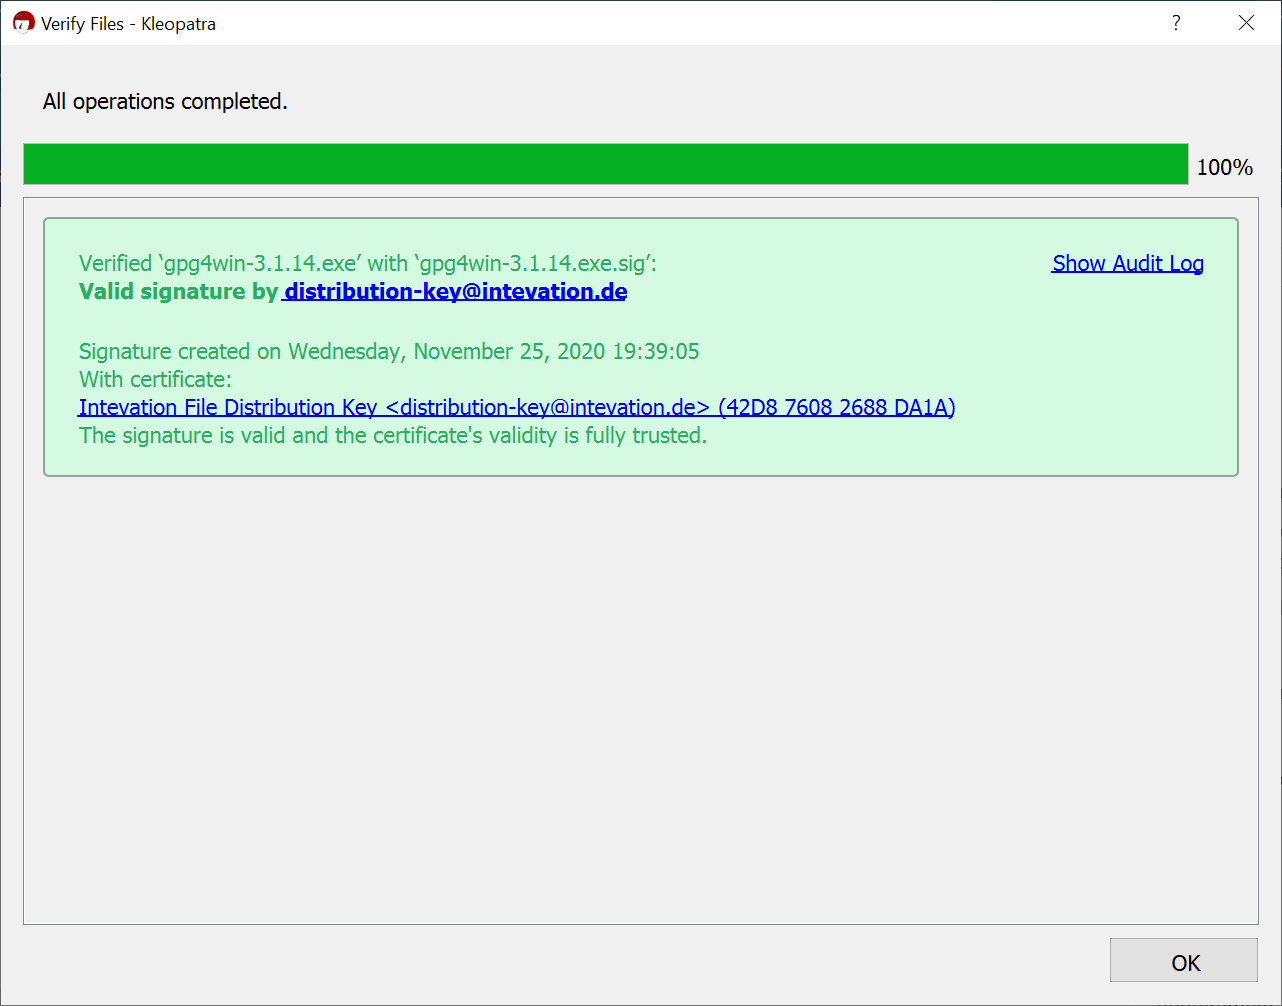
5.11 โปรแกรมจะทำการ Verify gpg4win-3.1.14.exe ด้วย gpg4win-3.1.14.exe.sig โดยใช้ Public OpenPGP Key ที่อยู่ในไฟล์ Intevation-Distribution-Key-2016.asc ถ้า Digital Signature ถูกต้องจะแสดงหน้าจอ The signature is valid and the certificate’s validity is fully trusted. ดังภาพด้านล่าง
Members
- Athiporn Phumnicom
- Phureephat Sottiratanapan
- Sununta Labaiusuh
Cookie-based Session Management

2020-11-29 00:00:00 +0000
V3.4 Cookie-based Session Management
Cookies
การแลกเปลี่ยน Session ID โดยใช้ Cookies มีคุณลักษณะด้านความปลอดภัยหลายอย่างในรูปแบบของ แอตทริบิวต์ ที่สามารถใช้เพื่อป้องกันการแลกเปลี่ยน Session ID ได้
3.4.1 Verify that cookie-based session tokens have the ‘Secure’ attribute set.
Secure Flag เมื่อมีการระบุแอตทริบิวต์นี้ จะเป็นการกำหนดว่า Cookie จะต้องส่งผ่านทางโปรโตคอล https (TLS/SSL) เท่านั้น โดยกระบวนการนี้จะเป็นวิธีการปกป้อง Session ID จากการถูกโจมตีด้วย Man-in-the-Middle เนื่องจากข้อมูลที่ส่งได้ทำการเข้ารหัสแล้ว
3.4.2 Verify that cookie-based session tokens have the ‘HttpOnly’ attribute set.
HttpOnly Flag เมื่อมีการระบุแอตทริบิวต์นี้ เว็บเบราเซอร์จะไม่อนุญาตให้ JavaScript เข้าถึงข้อมูล web cookie ของผู้ใช้งานได้ ดังนั้น document.cookie จะไม่สามารถเรียกใช้งานได้ ช่วยลดปัญหาช่องโหว่ประเภท XSS ได้
3.4.3 Verify that cookie-based session tokens utilize the ‘SameSite’ attribute to limit exposure to cross-site request forgery attacks.
SameSite Flag เป็นแอตทริบิวต์สำหรับกำหนดเพื่อป้องกันการโจมตีในรูปแบบของ Cross-Site Request Forgery (CSRF) ด้วยการป้องกันต้นทางของ Cookie ที่จะส่งมายัง Server
การกำหนด SameSite มี 3 รูปแบบ
- Lax คือการอนุญาตให้ส่ง Cookie ต้นทางจาก Website อื่นได้ ผ่าน HTTP GET บน Address bar เท่านั้น (การกด Link)
- Strict Cookie จะต้องถูกส่งมาจากต้นทางจาก Website เดียวกันเท่านั้น
- None คือการอนุญาต Cookie ต้นทางจากทั้งหมด แต่จะต้องใช้งานร่วมกับการกำหนด Secure Flag ด้วย (ส่งผ่าน https เท่านั้น)
3.4.4 Verify that cookie-based session tokens use “__Host-“ prefix to provide session cookie confidentiality.
__Host- prefix เป็นการกำหนดเพื่อระบุว่าผู้ที่สามารถเข้าถึงและแก้ไข Cookie ได้จะต้องเป็น Domain เดียวกัน (Subdomain ไม่สามารถเข้าถึงหรือแก้ไขได้)
3.4.5 Verify that if the application is published under a domain name with other applications that set or use session cookies that might override or disclose the session cookies, set the path attribute in cookie-based session tokens using the most precise path posible.
การตรวจสอบแอปพลิเคชั่นว่าอยู่ภายใต้โดเมนเดียวกันหรือไม่ เพื่อป้องกันการถูกเขียนทับของ Cookie หรือการเข้าถึง Cookie โดยไม่ได้รับอนุญาต
การกำหนด Domain แอตทริบิวต์ เป็นการระบุ hosts ที่อนุญาตให้รับ Cookie ได้ หากไม่ได้ระบุ ค่า default จะเป็น origin เดียวกันแต่ไม่รวม Subdomain แต่ถ้ามีการระบุ Domain ไว้ Subdomain จะถูกรวมอยู่ในนั้นด้วย
ตัวอย่าง : ถ้ากำหนด Domain=mut.com ไว้ Cookie จะสามารถใช้งานภายใต้โดเมน mut.com รวมถึง ซับโดเมนด้วย เช่น miss.mut.com
การกำหนด Path แอตทริบิวต์ จะเป็นการอนุญาตให้กำหนดหรือใช้งาน Cookie ภายใต้ Path ที่กำหนดได้
ตัวอย่าง : ถ้ากำหนด Path=/docs เส้นทางที่ Match กับ /docs จะสามารถใช้งาน Cookie ได้ เช่น
- /docs
- /docs/web
- /docs/web/https